If your injection-molded parts keep showing sink marks, warpage, or uneven dimensions, the problem often isn’t your mold design or machine settings. In many cases, it’s the mold temperature. And when the temperature isn’t stable, nothing else stays stable.
We’ve seen this happen in countless projects. Engineers spend hours tuning pressure and speed, but the defects remain—until they fix the temperature. Once the mold runs at a steady, proper range, the part fills better, cools evenly, and the whole process becomes predictable again.
If you’ve been stuck in a cycle of troubleshooting, mold temperature control is the first place worth a closer look.

How Mold Temperature Shapes Flow, Packing, and Cooling
When you change the mold temperature, you change the behavior of the plastic. That’s why even a small shift, sometimes only two or three degrees, can completely change how the part fills or cools. If you’ve ever wondered why a part looks perfect on one shift and unstable on the next, this is usually the reason.
Melt Flow: Your First Signal Something Is Off
Hot molds let the melt flow smoothly. Cold molds shut the melt down too fast. You’ve probably seen this yourself. When the mold is too cold, the gate freezes early, the flow front slows down, and you end up with short shots or dull surfaces.
But when the mold is too hot, the melt moves too freely. You may get flash around the parting line or weld lines that stand out more. This is why balancing mold temperature isn’t about “high” or “low”—it’s about matching it to the part and the material.
A simple example:
- ABS usually flows well at 60–70°C mold temperature.
- PC often needs 100–120°C to prevent stress.
- PA66 tends to warp badly if you run below 80°C.
If you run all three materials at the same mold temperature, you will fight defects all day.
Packing: The Hidden Stage That Most People Ignore
Packing pressure needs time to reach the thick sections of a part. When the mold is too cold, the surface freezes early, so the pressure never reaches the inside. That’s when you see sink marks on ribs or bosses, even if you raise holding pressure to the limit.
A hotter mold stays open longer. This gives the melt more time to respond to packing pressure, helping you fill those hard-to-reach areas. If your part has deep ribs or thick bases, mold temperature plays a bigger role than injection pressure.
This is something we see engineers misunderstand often. They increase pressure and speed again and again, but the real fix is stabilizing the mold temperature curve.
Cooling: The Stage That Decides Your Dimensional Accuracy
Cooling is where temperature control matters the most. About half of your cycle time is cooling, and the part does most of its shrinking during this stage. When the mold temperature is uneven—even if the overall temperature seems “correct”—the part shrinks unevenly too.
You’ll notice symptoms like:
- One side of the part bends or lifts
- Holes go out of round
- Snap-fits lose tension
- Flat surfaces deform after ejection
What causes these issues most of the time?
A temperature gradient. One area cools faster than another. This creates internal stress, and that stress pushes the part out of shape as soon as you eject it.
This is why stable, even mold temperature often solves warpage faster than any pressure adjustment you can make.
Why Thin-Wall and Cosmetic Parts Need Higher Mold Temperature
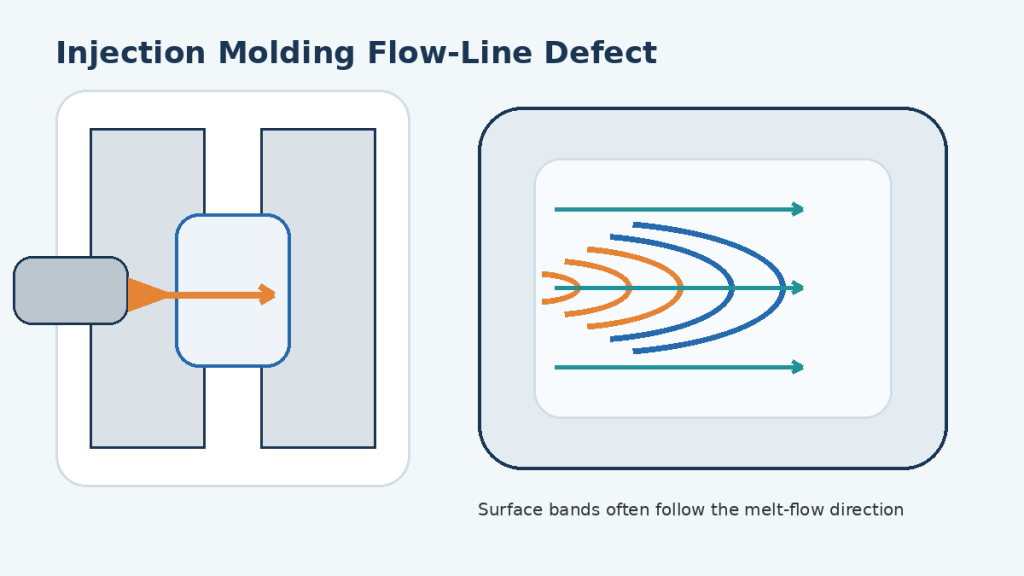
If you work with thin-wall designs or smooth cosmetic surfaces, you already know low mold temperature is the enemy. The melt freezes before it fills the last 10% of the cavity. You get flow lines, dull patches, and hesitation marks.
A higher mold temperature gives the melt time to reach the edges and form a clean surface. This is also why PC, PMMA, and high-gloss ABS almost always require hotter molds.
When Lower Mold Temperature Actually Makes Sense
Not every part needs a high mold temperature. If the part is thick, structural, or non-cosmetic, a lower temperature can speed up the cycle without hurting functional performance.
But even then, the temperature must be stable. A “cold but unstable” mold creates far more problems than a “hot but stable” mold.
Common Injection Molding Defects Caused by Wrong Mold Temperature
When the mold temperature is off, the defects always show up before the cause becomes obvious. And if you’re like many engineers we’ve worked with, you may spend hours adjusting the wrong settings before realizing the temperature is the real reason.
Here are the defects that almost always point back to poor temperature control—and what they’re actually telling you.
Sink Marks
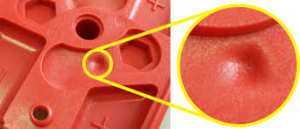
Sink marks are one of those defects that feel impossible to eliminate when you don’t know where to look. You raise packing pressure, slow down injection, or try a different resin—but the marks stay.
Most of the time, the mold is simply too cold.
A cold mold freezes the surface first. Once that happens, the packing pressure can’t reach the inside of thick sections or ribs. The melt shrinks inside, and the outer wall sinks.
What usually triggers sink marks:
- Mold temperature is too low
- Surface freezes too early
- The cooling rate is too fast in thick areas
- Water lines too far from ribs or bosses
What actually works (and we’ve seen this fix many cases):
- Raise the mold temperature a few degrees
- Improve water flow around thick sections
- Switch from laminar to turbulent cooling
- Use an external temperature stabilizer when the machine’s heater can’t keep up
You don’t need a major redesign. You just need the melt to stay “alive” long enough for the packing pressure to reach the core of the part.
Warpage
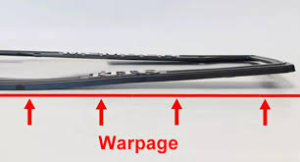
Nothing frustrates engineers more than warpage. You think you fixed it, then the next batch bends again. In our experience, warpage almost always comes from uneven temperatures inside the mold—not from pressure or speed.
When one area cools faster, that side shrinks more, and the part twists.
Typical causes:
- One side of the mold runs hotter than the other
- Uneven water channel spacing
- Cooling lines too shallow or too deep
- Hot runners heating the core unevenly
- Mold temperature swings during long cycles
Here’s where the real information gain comes in:
A mold can have the correct temperature and still warp the part if the temperature distribution is uneven.
That’s why you see parts that look fine in the morning but warp in the afternoon—temperature stability changed, not the target setting.
A few solutions that truly help:
- Add a dedicated cooling loop near problem zones
- Switch from series to parallel cooling
- Consider conformal cooling if the geometry traps heat
- Stabilize water temperature using a reliable loop
Once cooling is even, warpage often disappears without changing injection settings at all.
Short Shot
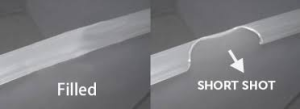
Short shots are usually blamed on viscosity or injection pressure. But before you push the machine harder, check your mold temperature.
A mold that runs too cold blocks the flow front early. The melt freezes first in thin-walled areas, and the cavity never fills.
Real signals your mold is too cold:
- Melt stops at the same thin area every cycle
- Weld lines look sharp or dull
- The flow pattern shows hesitation marks
- The gate freezes earlier than expected
If you’ve seen this pattern, raising mold temperature almost always improves flow more than raising pressure.
Practical fixes:
- Increase mold temperature
- Dry resin properly (cold molds + wet resin = poor flow)
- Shorten the cooling segment if the mold overcools
- Reduce water flow in areas that freeze too fast
- Improve venting in thin sections
Short shots don’t always mean you need more power.
Sometimes you just need the melt to stay fluid for two more centimeters.
Surface Defects
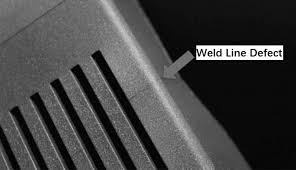
Surface issues often make engineers question the resin quality. But most cases are simply caused by the surface freezing too early.
When the mold is too cold, the melt hits the surface and forms a skin before the rest of the flow arrives. That skin stretches, wrinkles, or freezes in a way that breaks the surface gloss.
Common causes of surface defects:
- Mold temperature is too low
- Unstable mold temperature during long runs
- Cold spots caused by uneven cooling lines
- Fast cooling in cosmetic zones
- High-viscosity resins (PC, PMMA) running below ideal temperatures
What improves the surface instantly:
- Raise the mold temperature in cosmetic regions
- Balance cooling so the surface temperature doesn’t drop mid-cycle
- Add insulation to avoid cold metal near cosmetic areas
- Slow down cooling just enough to prevent early freezing
One insight many people overlook:
Surface defects often come from temperature swings, not the absolute temperature. Even a ±3°C shift can ruin a glossy finish.
What Controls Mold Temperature?
If you want your molding process to stay stable, you need more than a target temperature on a screen. You need a system that can heat the mold, cool it, and hold that temperature steady through every cycle. Many engineers overlook this part, and that’s why good molds sometimes produce unstable parts. Let’s break down the components that actually control mold temperature and why they matter more than most people think.
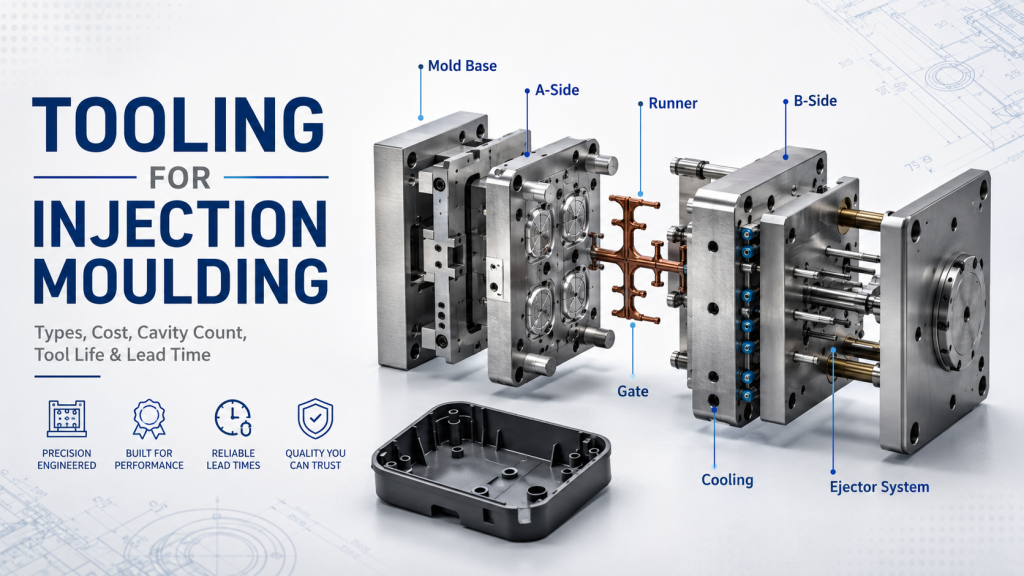
Mold Cooling Channels
The cooling channels inside the mold decide how evenly and how quickly the part cools. When the channel design is poor, no machine setting can rescue the process. I’ve seen molds with great steel work perform badly simply because the cooling wasn’t planned well.
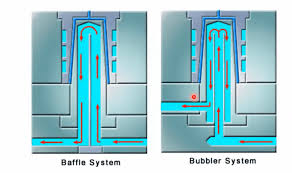
Here are the key details that affect cooling:
Water Line Diameter: Small channels restrict flow. When the water moves too slowly, it can’t remove heat effectively. This leads to hot spots, especially around ribs, bosses, or thick sections.
Channel Position
If the channels sit too far from the cavity wall, heat takes too long to reach the coolant. If they are too close, you get cold spots that cause uneven shrinkage. Most warpage issues start with inconsistent distances between the channels and the part surface.
Flow Speed and Water Behavior
Flow speed matters more than most people expect. Slow water creates laminar flow, where the water moves in layers and heat transfer is weak. Faster water creates turbulent flow, which mixes more and pulls heat out much faster.
If you’ve ever seen a mold where one corner cools slower than the rest, this is often the reason.
Series vs. Parallel Cooling
- Series circuits send water through one channel after another. The water gets hotter as it moves, so the last area always cools less effectively.
- Parallel circuits feed water to each channel at the same temperature. This produces much more consistent cooling.
When cooling lines are not balanced, the part cools unevenly—and the defects follow.
Mold Temperature Controller (MTC)

The mold temperature controller does more than heat the mold. Its real job is to keep the temperature stable during every shot. If the mold swings even a few degrees, your part dimensions will swing too.
Here’s what an MTC is responsible for:
- Heating During Start-Up: Before production begins, the MTC brings the mold to the correct temperature. Starting cold is one of the fastest ways to create scrap.
- Holding a Stable Temperature During Production: Each cycle adds heat from the melt and loses heat when the mold opens. The MTC balances these changes and keeps the temperature from drifting.
- Precision for High-Quality Parts: Some parts need tight temperature control. High-gloss surfaces, optical components, and engineering plastics often need stability within ±0.5°C. If the MTC can’t maintain that level of accuracy, you’ll see defects even if everything else is correct.
Temperature stability is often the difference between a process that runs smoothly and one that constantly needs adjustment.
Chiller (Industrial Cooling Source)
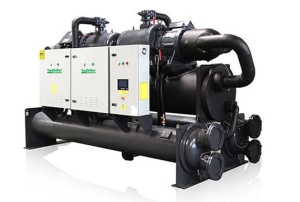
When your process demands steady cooling—especially during long production runs—the MTC alone is not enough. It still needs a stable supply of cold water. That’s why many injection molding factories rely on an industrial chiller to keep coolant temperature consistent.
A chiller prevents the cooling water from getting warmer as the shift goes on. Without it, your mold slowly heats up, and your part quality changes with it. The defects don’t appear immediately—they build over time.
Here’s what a chiller actually does:
- Delivers Controlled Cold Water (Typically 5–25°C): Stable water temperature means stable mold temperature. When the cooling source is steady, your part dimensions stay far more consistent.
- Prevents Overheating During Long Runs: If the mold gains heat during the day, you’ll start seeing warpage, sink marks, or short shots. A chiller keeps the cooling loop from drifting into those risk zones.
- Helps Reduce Cycle Time: When cooling is fast and predictable, you can shorten the cycle without hurting quality. This is one of the easiest ways to increase output without changing the mold.
- Protects the Mold from Thermal Stress: Heat expansion and contraction can stress the steel. With stable cooling, the mold sees less thermal fatigue, which helps it last longer.
A chiller becomes essential when you run thick-wall parts, large molds, engineering plastics, or any job that demands consistent production quality.
How to Choose the Right Mold Temperature for Different Materials
Choosing the right mold temperature requires understanding what the plastic needs at each stage—flow, packing, cooling, and how the temperature affects the final part.
Below are common materials and the temperatures that typically work best:
ABS: 60–70°C (Up to 80°C for Cosmetic Parts)
ABS flows easily, so you don’t need a very hot mold to fill the cavity. But when you want a high-gloss finish or want to reduce weld-line visibility, a warmer mold helps.
Why ABS needs this range:
- Lower temperatures shorten the cycle but increase the risk of flow marks.
- Higher temperatures improve surface quality and reduce internal stress.
- If your ABS part warps, it often means the mold is too cold or cools unevenly.
You’ll usually see better results with a slightly higher mold temperature when you’re working on:
- Thin-wall parts that freeze too quickly
- Large cosmetic surfaces that need consistent gloss
- Ribs or thicker sections where sink marks tend to appear
ABS gives you flexibility, but it rewards you when the mold runs steadily and is warm.
PC: 100–120°C (Needed to Prevent Stress Cracking)
PC behaves differently from ABS. It freezes fast when the mold is too cold, and that traps stress inside the part. This is why a PC part can look perfect right after molding but crack hours—or even days—later. Most of the time, the mold never gave the material enough heat to release that internal stress.
Why does PC need a hotter mold
- A higher mold temperature lets the polymer chains relax instead of freezing in a stressed state.
- It reduces stress fractures around tight corners, ribs, or bosses.
- Clear PC parts become more transparent and less cloudy when the mold stays warm and stable.
If your PC parts keep cracking, don’t jump to higher packing pressure. That usually makes the stress worse. Raise the mold temperature first—it solves the root cause instead of chasing symptoms.
PC performs much better when the mold runs warm and holds that temperature steady. Once the temperature stops drifting, you’ll see fewer cracks, smoother surfaces, and parts that stay stable after ejection.
PA66: 80–100°C (To Improve Crystallinity)
PA66 shrinks a lot during cooling. If the mold is too cold, the polymer can’t crystallize properly, and you get unstable dimensions or warpage. A hotter mold helps PA66 form a more uniform internal structure.
Why does PA66 demand higher temperatures:
- Better crystallinity means better stability.
- Too-cold molds cause curved walls and inconsistent shrink.
- PA66 absorbs moisture; temperature helps control part stress.
PA66 especially needs a warmer mold when the part must hold tight dimensions, stay flat, or has ribs and thicker areas that shrink at different speeds.
If your PA66 part curves like a leaf, the mold temperature is usually the first thing to fix.
POM: 70–100°C (Balancing Flow and Shrinkage)
POM flows well and cools quickly. But if the mold cools too fast, the part shrinks unevenly and becomes brittle. A slightly higher mold temperature helps the material pack more evenly.
Why this temperature window works:
- Warmer molds reduce sink marks in thick sections.
- Cold molds increase internal stress and edge cracks.
- Balanced mold temperature gives more consistent shrinkage.
If you run POM too cold, you will spend the whole day chasing dimensional variation.
PP: 20–60°C (Efficiency Over Appearance)
PP is one of the easiest materials to mold. It flows well, fills the cavity quickly, and usually shrinks in a predictable way. Because of that, the mold temperature often plays a bigger role in cycle time than in appearance. Many factories run a PP cooler to speed up production, and most of the time, it works.
Why PP runs well at lower temperatures:
- Good flow characteristics
- Suitable for fast-cycle parts
- Less sensitive to surface defects
But lower mold temperature is not always better. When PP parts warp, the real problem is often uneven cooling, not the absolute temperature.
A slightly higher mold temperature helps when the part includes a living hinge, has thin walls that freeze too quickly, or is long and flat enough to bend during cooling. In these cases, warmer and more even cooling keeps PP from shrinking at different speeds and helps the part keep its shape.
PP loves speed, but it still needs stable cooling.
How to Decide the Right Mold Temperature for Any Material
Instead of relying only on numbers, here’s how you can make smarter choices:
- Start with the part’s purpose: A cosmetic panel needs a hotter mold than a hidden structural part.
- Look at wall thickness: Thin walls cool and freeze quickly, so they often need a slightly higher mold temperature. Thick walls hold heat longer, which means they usually work better with a lower but stable mold temperature.
- Consider embedded metal inserts: Inserts hold heat differently. If you run too cold, the plastic freezes around them and creates stress pockets.
- Follow the shrinkage behavior of the material: High-shrink materials (like PA66) want more heat to stabilize the structure.
- Match the tolerance needs: Tight tolerances almost always require a warmer, more stable mold temperature.
Here’s the part many engineers overlook:
The right mold temperature reduces defects more reliably than adjusting pressure or speed. Once you match the temperature to the material and part design, everything else becomes easier.
Optimizing Mold Cooling for Higher Productivity
Cooling often decides how fast your mold can run. In many molds, cooling alone takes 50–70% of the entire cycle time. That means even small improvements in cooling can give you big gains in output. From what we see in real production, most cooling issues don’t come from poor machines—they come from water that isn’t moving fast enough, channels that don’t cover the cavity well, or temperature differences across the mold.
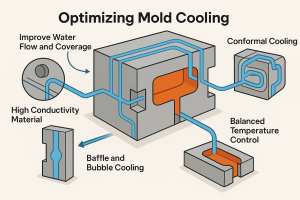
Here are the practical ways to optimize cooling:
1. Improve Water Flow and Coverage
A lot of cooling problems disappear when the water moves faster and reaches the areas that need it most. Slow flow creates laminar water, which removes heat poorly. Faster flow creates turbulence, and heat leaves the steel much quicker.
Here are practical ways to optimize cooling:
- Increase flow speed when possible.
- Add more channels to cover thick or hot spots.
- Use parallel water circuits instead of series to keep inlet water at the same temperature across all channels.
Even without changing the mold design, switching to parallel flow often stabilizes dimensions and cuts the cooling time noticeably.
2. Use High Conductivity Materials Where It Counts
Not every part of the mold has to be steel. In areas where heat builds up (around thick ribs, deep bosses, or shut-offs), using a material like beryllium copper can make a big difference. It pulls heat out faster and helps the mold cool evenly.
We’ve seen cases where adding a beryllium copper insert reduced cooling time by several seconds without touching the rest of the mold.
3. Conformal Cooling (3D Printed Cooling Channels)
Conformal cooling is one of the biggest advances in mold design in the last decade. Instead of drilling straight channels, you can build cooling lines that follow the actual shape of the cavity. This keeps the distance between the channel and the part wall consistent—something traditional machining can’t do.
What it achieves:
- 30–70% better cooling uniformity
- 20–40% shorter cycle times
- Less warpage because the entire part cools at the same pace
If your mold has deep curves, thick sections, or areas where normal channels can’t reach, conformal cooling is often the most effective upgrade.
4. Baffle and Bubble Cooling for Deep or Narrow Areas
Not every mold can be redesigned, and not every company can jump to conformal cooling immediately. In many cases, baffles and bubble cooling provide strong improvements with simpler tooling changes.
- Baffles split the water path so water hits two sides of a deep cavity instead of flowing through a single pipe.
- Bubble cooling helps water swirl in tight spaces, pulling heat out where normal flow is weak.
These methods work especially well for deep ribs, tall cores, or narrow pockets that otherwise trap heat.
5. Reduce Cooling Time Through Balanced Temperature Control
You don’t always need to drop the mold temperature. Often, what matters is that the temperature stays even across the mold. When one side cools faster than the other, parts warp or shrink unevenly.
Practical steps include:
- Matching waterline lengths in parallel circuits
- Using flow meters to verify real flow instead of relying on pump settings
- Keeping the mold temperature controller and chiller running steadily from start to finish
Balanced cooling is often the quickest way to avoid deformation without slowing the cycle.
Cooling Optimization Will Deliver the Biggest ROI
Many engineers focus on injection speed or pressure when solving defects. But once the cooling is fast and consistent, everything else becomes easier:
- Cycle time shrinks
- Warpage decreases
- Dimensions stabilize
- Materials with high shrinkage or stress sensitivity behave better
Cooling is one of the few improvements that boosts both quality and productivity at the same time. A well-designed cooling system turns a mold from “hard to control” into “runs all day without surprises.”
When Should You Upgrade Your Mold Cooling System?
Cooling systems don’t fail overnight. They fall behind quietly—one defect, one slow cycle, one temperature drift at a time. If your mold has been running for years and you’re starting to see issues that never used to happen, the cooling system is often the part that needs attention. The signs are usually clear once you know what to look for.
1. The Cycle Time Doesn’t Go Any Lower
If you’ve optimized the injection parameters, reduced packing time, and tuned the mold temperature—but the cooling portion of the cycle just won’t shorten anymore—your water system may be the bottleneck. Old or inefficient channels, slow water flow, or weak cooling capacity hold back productivity no matter what machine settings you change.
When cooling takes up most of the cycle and refuses to budge, it’s a strong signal that the system needs an upgrade.
2. Dimensional Variation Between Batches
Parts that used to stay within tolerance may now drift across batches. You might see this as slight warpage on some days, perfect parts on others. In most cases, the mold temperature isn’t stable across each shift.
This happens when water channels scale up, flow slows down, or the cooling source can’t keep the inlet temperature steady. Even small swings create noticeable dimensional variation in materials like PA66, PC, or POM.
3. Mold Temperature Fluctuates During Production
A healthy mold should hold temperature with minimal drift. When you see the temperature swing several degrees across the day, even though the setpoint hasn’t changed, the cooling system is no longer matching the heat load.
In this situation, the mold temperature controller works harder, keeps overshooting, and the part quality becomes inconsistent. This is one of the clearest signs the system needs attention.
4. Surface Defects That Process Adjustments Can’t Fix
If you’ve adjusted packing, speed, or holding but still see:
- sink marks that won’t disappear
- inconsistent gloss
- soft spots or thick-wall cooling issues
- warpage that keeps coming back
Then the mold isn’t cooling evenly anymore. Once the cooling system becomes unstable, no machine parameter can compensate for it.
5. Lower Tool Life and More Frequent Repairs
Overheated cores, metal fatigue, and hot spots in the steel are often cooling problems in disguise. If you’re repairing the mold more frequently than before (worn cores, cracked inserts, deformed shut-offs), chances are the cooling system is creating thermal stress the mold wasn’t designed for.
A stable cooling system protects the steel as much as it protects the part.
What You Can Do to Fix These Problems
Once you’ve seen one or more of these signs, small adjustments won’t solve the root cause. The most effective steps usually include:
- Rebuilding or reworking the water channels: Especially when the mold is older, clogged, or shows uneven flow. New or redirected channels often recover several seconds of cycle time.
- Adding a higher-capacity mold temperature controller: If the mold frequently overshoots or struggles to hold the setpoint, a more capable MTC helps restore temperature stability.
- Using an industrial chiller to stabilize the cooling source: For many shops, this is the turning point. An industrial chiller keeps the inlet water temperature stable even during long production runs or heavy heat loads. When the cooling water stops drifting, your mold temperature becomes steady again—and most defects tied to temperature simply disappear.
Whether you choose to modify the waterlines, upgrade the temperature controller, or add a dedicated chiller, the goal is the same: restore fast, even, and predictable cooling so your mold runs like it used to.
Final Thoughts
Over the years, we’ve seen many teams chase defects through pressure settings, speeds, or packing profiles—only to realize the real issue was mold temperature drifting a few degrees. Once the temperature stays steady, the part stabilizes, the mold stops fighting you, and the cycle time drops on its own.
If you’re working on new molds or trying to improve an existing process, taking a deeper look at temperature control is often the simplest way to make everything else run smoothly.