Thin walls show up in many plastic part designs—sometimes because of weight reduction goals, sometimes because the product needs a sleek form factor. But they also come with headaches: short shots, warpage, or surfaces that fail to meet cosmetic standards. The simplest way to avoid these problems is often to thicken the wall. Yet in reality, you don’t always have that option. Function, appearance, or cost targets may force thin walls to stay in the design.
This guide walks you through the critical aspects of thin wall injection molding—covering design principles, material selection, processing parameters, troubleshooting, and real industry applications. So that you can avoid costly trial-and-error and get parts into production with confidence.
What Qualifies as Thin Wall Injection Molding?
There’s no single universal cutoff for what counts as “thin wall.” In practice, it depends on the material, part geometry, and machine capability.
For example, a 1 mm wall made of polypropylene (PP) may fill easily because the resin flows well. However, the same 1 mm wall in polycarbonate (PC) can result in short shots. Likewise, a thin, short cup can mold without issue, while a thin, long housing with ribs demands far higher injection speed and clamp force. And even the same part might behave differently on different machines: what counts as “thin wall” on a standard hydraulic press could mold reliably on a high-speed electric press.
Still, most engineers follow two common benchmarks:
- Strict definition: walls ≤1.0 mm (0.04 in.)
- Broader definition: walls up to 2.0 mm (0.08 in.), especially for larger parts or lower-flow resins
What really defines thin-wall molding isn’t just the thickness itself—it’s the fact that the flow length-to-wall thickness ratio (L/t) gets very high. Once that ratio climbs above 150:1, the process starts demanding higher injection speeds, greater clamp tonnage, and tighter cooling control compared to conventional molding.

Thin Wall vs. Conventional Injection Molding
| Feature / Requirement | Thin Wall Molding | Conventional Molding |
| Typical Wall Thickness | ≤ 1.0–2.0 mm | 2.5–4.0 mm or more |
| Flow Length-to-Thickness Ratio | 150:1 or higher | 100:1 or lower |
| Injection Speed | 300–600 mm/s (high-speed machines) | 50–150 mm/s |
| Clamp Force Requirement | Higher, to resist cavity pressure | Lower, standard tonnage |
| Cooling Control | Very tight, uniform temperature | Less demanding, wider tolerance |
| Common Applications | Packaging, medical disposables, and electronics housings | Automotive, appliances, and general parts |
In short, A part is considered a thin wall not only because the walls are thin, but because filling those walls requires higher injection speed, pressure, and precise mold design than normal molding. If you find your part requires unusually high injection speeds or special mold design just to fill consistently, you’re dealing with thin-wall molding.
Materials for Thin Wall Parts
When you’re designing thin wall parts, the resin choice can make or break your success. A thin section that runs smoothly with one material may be impossible with another. That’s because flowability, stiffness, and heat resistance all interact differently under thin wall conditions.
Take polypropylene (PP), for example—it has excellent flow, making it the go-to for food packaging, lids, and disposable containers where walls often dip below 1 mm. On the other hand, polycarbonate (PC) provides far greater stiffness and impact strength, but its higher viscosity. This means filling very thin sections is a challenge unless you have high-speed injection equipment. Polystyrene (PS) offers easy flow and clarity but lacks toughness, while engineering resins like PEI (polyetherimide) can withstand higher service temperatures but demand more careful process control.

Comparative Table: Materials in Thin Wall Injection Molding
| Property / Material | Polypropylene (PP) | Polystyrene (PS) | Polycarbonate (PC) | Polyetherimide (PEI) |
| Flowability | Excellent (fills <1 mm walls) | Excellent | Fair to Poor | Fair |
| Stiffness | Medium | Low to Medium | High | Very High |
| Impact Resistance | Medium–High | Low | High | High |
| Heat Resistance | Up to ~100 °C | Up to ~90 °C | Up to ~120 °C | Up to ~170 °C |
| Thin Wall Feasibility | Common for lids, containers | Good for clear parts, short flow paths | Limited to ~1.5–2 mm unless aided by special design | Possible, but requires powerful machines and careful mold design |
| Typical Applications | Packaging, disposables | Transparent housings, labware | Electronics housings, safety parts | Medical, aerospace, high-heat connectors |
If you’re pushing wall thickness below 1 mm, you’ll usually need a high-flow resin like PP or PS. When you can’t compromise on stiffness or heat resistance, you may turn to PC or PEI, but that requires more robust mold design and faster machines to keep the part fill consistent.
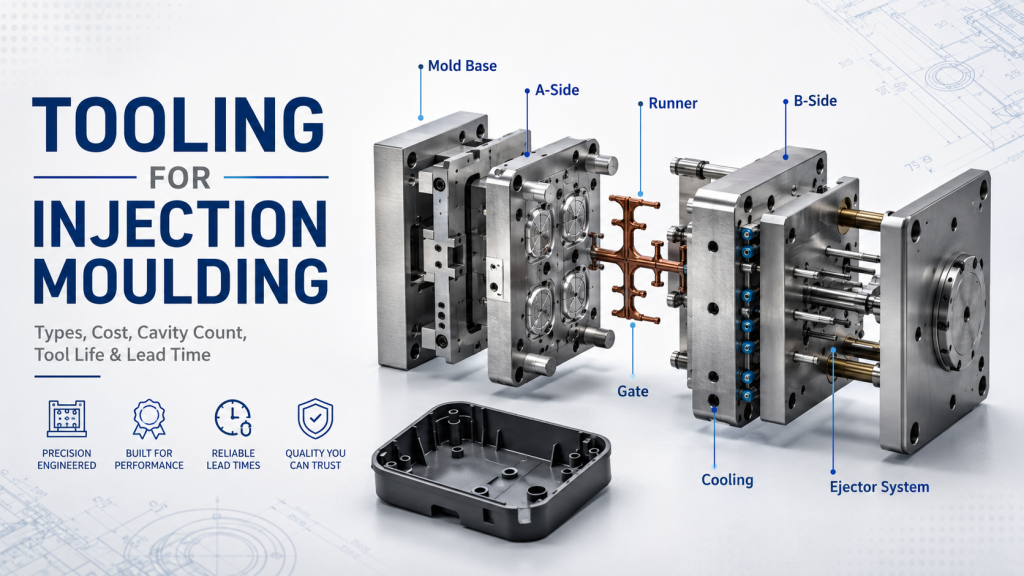
Mold Design Principles for Thin Wall Injection Molding
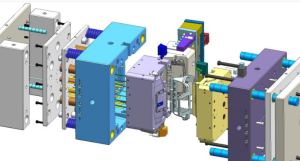
If material selection determines whether thin walls are possible, then mold design determines whether they’re repeatable. Thin-wall injection molding puts much greater stress on the mold compared to conventional molding. Every design choice, from steel grade to gate layout, has a direct impact on cycle time and part quality.
1. Mold Steel and Durability
Thin wall parts require high injection pressure and fast filling. That means the mold must withstand not only higher cavity pressures but also more rapid thermal cycling. Hardened tool steels (H13, S7) are usually preferred over softer grades or aluminum. While aluminum is great for prototype tooling, it can wear quickly when subjected to the aggressive processing needed for thin walls.
2. Gate and Runner Design
The goal is to get molten resin into the cavity as fast and evenly as possible.
- Hot runner systems are common, because they reduce pressure loss and keep the melt hot until it reaches the cavity.
- Wider, more streamlined runners can cut filling time significantly.
- For very thin parts, edge gates or valve gates are positioned to minimize weld lines and ensure flow fronts meet cleanly.
3. Venting and Cooling
Because thin sections solidify rapidly, poor venting almost guarantees short shots or burn marks. Mold designers must add sufficient vents at the parting line and consider micro-vents near the end of fill.
Cooling is equally critical: thin walls cool fast, but uneven cooling leads to warpage. Uniform cooling channels, sometimes using conformal cooling (3D printed inserts), help keep cycle times down while maintaining dimensional accuracy.
Case Example: Food Packaging Mold
One packaging manufacturer needed to produce thin-walled polypropylene containers with a cycle time competitive to high-volume market demands. By switching from a traditional cold runner to a hot runner system with optimized flow channel cross-sections, they reduced the filling pressure by nearly 20%. The mold redesign, combined with improved cooling layout, shortened the cycle time by 15%, allowing the customer to hit production targets while lowering per-part costs.
Mold design for thin wall injection molding isn’t just about making the part fit—it’s about enabling high-speed, high-pressure filling with precise thermal balance. Skimp on mold design, and no machine or resin will save you from defects and high scrap rates.
Processing Parameters and Machine Requirements
Once you’ve got the right material and a mold built for thin walls, the real test is whether your machine and process settings can keep up. Thin-wall injection molding pushes both equipment and operators harder than conventional molding—it’s about delivering high pressure and high speed in a very short window of time.
1. High-Speed Injection Machines
Thin walls freeze fast. To fill them before the melt solidifies, machines need injection speeds above 300 mm/s, with some applications running closer to 600 mm/s. Standard hydraulic presses often struggle here, which is why hybrid and all-electric presses dominate thin-wall molding. They can sustain high injection velocity and repeat it with precision across thousands of cycles.
2. Critical Processing Parameters
- Melt Temperature: Running too cool increases viscosity and leads to short shots; running too hot degrades the resin. Each resin has a narrow processing window you must stay within.
- Injection Speed and Pressure: Speed is critical to push the melt through thin flow paths. Pressure backs it up—thin-wall molding often requires peak cavity pressures 2–3× higher than conventional molding.
- Holding (Packing) Pressure: Essential to fight shrinkage and avoid sinks. Because thin walls solidify quickly, the pack/hold phase is short, but the pressure must be delivered precisely.
- Mold Temperature: Uniform and tightly controlled mold temps are key. If one side of a thin section freezes before the other, warpage is almost guaranteed.
Typical Processing Parameters for Common Resins in Thin-Wall Molding
| Resin | Melt Temp (°C) | Mold Temp (°C) | Injection Speed | Notes |
| Polypropylene (PP) | 200–250 | 20–50 | Very High (300–600 mm/s) | Excellent flow, common for food packaging |
| Polystyrene (PS) | 180–240 | 20–40 | High (250–500 mm/s) | Good clarity, lower impact strength |
| Polycarbonate (PC) | 260–310 | 80–120 | Medium–High (200–400 mm/s) | Stiff, needs higher temp and careful drying |
| PEI (Ultem) | 340–400 | 140–180 | Medium (150–300 mm/s) | High-heat parts require powerful machines |
Thin-wall molding is won or lost at the process setup stage. If your machine can’t sustain high speed and high pressure, or your process parameter isn’t tuned tightly, you’ll see short shots, burn marks, or warpage, no matter how good your mold design is.
Common Defects in Thin Wall Parts and How to Fix Them
Thin wall molding pushes both the material and the process close to their limits. As a result, some defects show up far more frequently than in conventional injection molding. Yet most of them follow predictable patterns, and once you know the cause, you can apply targeted fixes.
1. Short Shots
One of the first problems engineers run into with thin walls is the dreaded short shot. You open the mold and see that the plastic hasn’t completely filled the cavity—maybe the corners are missing, or a rib just stops halfway. It’s frustrating because the part looks almost right, but it’s not usable.
This usually happens because the resin cools and freezes before it reaches the end of the thin section. With a 1 mm wall, you only have a fraction of a second before the melt locks up. If your injection speed isn’t high enough, or the machine doesn’t deliver enough pressure, the flow just can’t make it to the end.
The fix often means pushing the process harder: raising injection speed, nudging melt temperature up, or even redesigning the gating so the resin doesn’t have to travel as far. In some cases, it’s not the process but the material itself—switching to a higher-flow grade of PP or PS can turn a short shot into a fully filled part without overloading the machine.
2. Warpage
Another issue that often shows up in thin wall parts is warpage. You mold the part, eject it, and at first glance, it looks fine. But as it cools outside the mold, you notice it bending or twisting slightly—edges don’t sit flat, or a housing cover doesn’t snap into place.
What’s happening is usually an imbalance in how the part cools. Thin sections solidify fast, but if one side cools just a little earlier than the other, the internal stresses pull the part out of shape. High injection pressure can make it worse, leaving locked-in stress that reveals itself as soon as the part relaxes.
Fixing warpage isn’t about pushing the machine harder—it’s about balance. That means redesigning cooling channels so both sides of the part cool evenly, tightening control of mold temperature, and sometimes dialing back the injection pressure peaks. Once you restore that balance, the part stays straight after ejection instead of curling up on the bench.
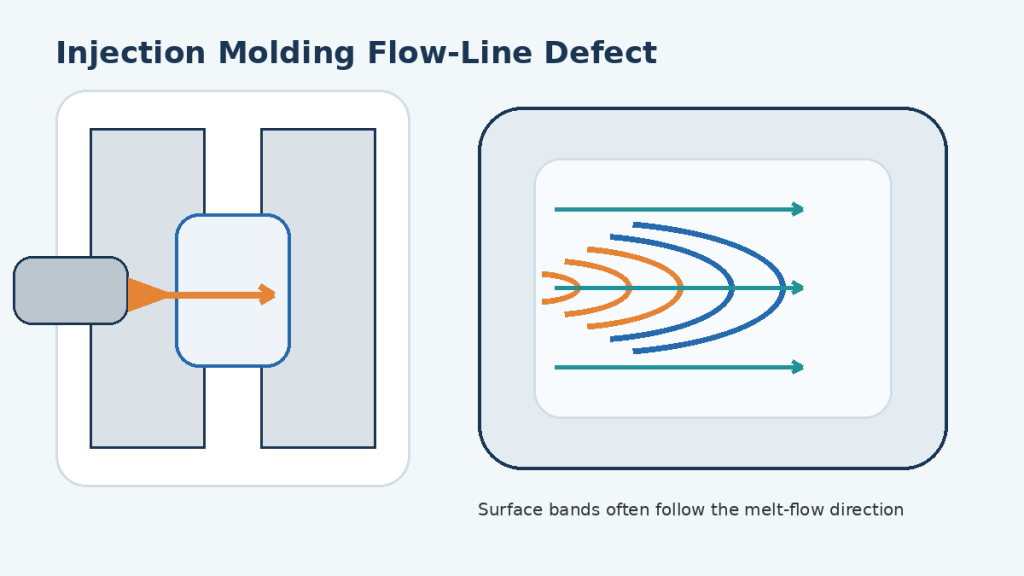
3. Weld Lines
Sometimes a part looks perfectly filled, but when you hold it up to the light, you notice a faint line running across the surface. On closer inspection, that line feels weaker—you can even snap the part more easily along it. That’s a weld line.
It forms when two flow fronts of molten plastic meet inside the cavity but don’t fuse properly. Imagine resin flowing around a core pin or splitting at a rib, then trying to rejoin. If the melt is already too cool or there isn’t enough venting to let trapped air escape, the fronts touch but don’t truly bond. The result is a visible seam that spoils the appearance and undermines the strength.
Solving weld lines usually means changing how the resin flows. You can raise the melt temperature or injection speed so the fronts meet while still hot and fluid, or adjust gate placement so they join in a less critical area. Sometimes it’s as simple as adding a vent at the end of the fill to give the air somewhere to go. Once the fronts merge under the right conditions, that weak seam disappears, and the part regains its intended strength and finish.
4. Sink Marks
You’ve probably seen sink marks before, even if you didn’t know the name. You take a thin wall part out of the mold, and at first, it looks fine. But when you tilt it under the light, you notice small dimples or depressions, usually around ribs or thicker features. They don’t just ruin the look of the part; in some cases, they also signal uneven packing inside.
Why do they happen? Picture the melt flowing into a part with both thin and slightly thicker areas. The thicker section cools more slowly, and as it shrinks, the surface above it pulls inward, leaving a small dent. In thin wall molding, this problem is amplified because there’s less material to compensate and less time to apply packing pressure.
Fixing sink marks is less about brute force and more about design and timing. If you keep the wall thickness more uniform, you remove the root cause. If you can’t change the design, extending holding pressure or adjusting rib dimensions often helps. The idea is to make sure every section—thin or thick—cools and packs as evenly as possible. When done right, the surface stays smooth, and the part looks as professional as it was meant to.
Defects’ Causes &Solutions at a Glance
| Defect | Root Cause | Typical Fixes |
| Short Shots | Thin walls freeze before filling | Raise injection speed/temperature, add gates, use high-flow resin |
| Warpage | Uneven cooling, residual stress | Balance cooling, adjust mold temp, reduce pressure |
| Weld Lines | Cold flow fronts, poor venting | Raise melt temp, optimize gates, add vents |
| Sink Marks | Thick-to-thin transitions, low pack | Improve wall uniformity, extend pack pressure, redesign ribs |
Thin-wall molding defects are rarely random—they’re almost always tied to flow, cooling, or pressure balance. The sooner you identify which of these is off, the faster you can fix the problem without wasting cycles on trial and error.
Applications and Industry Use Cases
Let’s look at where it makes the biggest impact and why manufacturers keep pushing the limits of thinner walls.
Packaging
Think of yogurt cups, beverage lids, or food containers. Here, shaving just 0.2–0.3 mm off the wall thickness can save thousands of kilograms of resin every year. One food packaging company reported that by switching to a thin-wall PP container design, they cut 20% of their resin use, which translated into over $200,000 in annual savings. At scale, material savings like this are the difference between a competitive price point and being pushed out of the market.
Medical
In the medical sector, thin wall molding enables disposable syringes, IV components, and diagnostic cartridges that must be sterile, lightweight, and mass-produced at speed. The combination of cycle-time reduction and reduced resin cost is critical here, especially when products are single-use. What’s more, many medical thin-wall parts require optical clarity (e.g., transparent PS or COP resins), so the process must balance both cosmetic and dimensional precision.

Consumer Electronics
Smartphones, laptops, and wearables are constantly getting thinner, lighter, and more compact. Thin wall injection molding makes possible slim housings, heat-dissipating structures, and cosmetic-grade enclosures. For these applications, the goal isn’t only material savings, but also a sleek form factor that supports thermal management and assembly fit.
Industrial and Automotive
Beyond packaging and electronics, thin-wall techniques are finding ground in automotive interior panels, instrument clusters, and lightweight housings. The ability to mold large but thin sections reduces vehicle weight and helps meet fuel efficiency and sustainability targets. In industrial settings, lightweight crates, storage bins, and housings benefit from both reduced material cost and easier handling.
Thin wall injection molding is a mainstream solution for industries chasing lower costs, lighter parts, and faster cycle times. From packaging to medical to electronics, the applications are diverse, but the unifying benefit is clear: when done right, thin walls save money and improve performance without compromising strength.
Thin Wall vs. Conventional Injection Molding
When you compare thin wall injection molding to conventional molding, the differences show up in three main areas: cost, technical requirements, and production efficiency.
Cost Trade-offs
Thin wall molding often requires more expensive molds and specialized machines, since the cavities need to withstand higher injection pressures and more precise cooling. But those costs can be offset by material savings and shorter cycle times. For example, a packaging company that switched from 2.5 mm to 1.0 mm walls cut resin consumption by almost 20%. Even though their tooling investment was higher, the savings quickly paid back once they scaled production.
Technical Demands
Thin wall molding isn’t forgiving. You need machines capable of extremely fast injection speeds, molds with optimized venting and cooling, and operators who understand how to tune parameters in seconds rather than minutes. Conventional molding, by contrast, allows a wider process window and standard machines.
Efficiency Gains
With thinner walls, cycle times shrink because parts cool faster. A cycle that takes 8 seconds in conventional molding might run in 4–5 seconds with a thin-wall design. Over millions of parts, this adds up to enormous output gains. That’s why high-volume industries like food packaging and medical disposables push for thinner walls despite the challenges.
At a Glance: Thin Wall vs Conventional Molding
| Feature / Requirement | Thin Wall Molding | Conventional Molding |
| Typical Wall Thickness | ≤ 1.0–2.0 mm | 2.5–4.0 mm or more |
| Flow Length-to-Thickness Ratio (L/t) | 150:1 or higher | 100:1 or lower |
| Injection Speed | 300–600 mm/s (high-speed machines) | 50–150 mm/s |
| Cycle Time | 3–6 seconds (shorter due to fast cooling) | 8–15 seconds |
| Material Use | Lower (up to 20–30% savings per part) | Higher |
| Tooling Cost | Higher (stronger steel, hot runners, tight cooling) | Lower (standard molds) |
| Operator Skill | High—narrow processing window | Moderate—more forgiving |
| Applications | Packaging, medical disposables, electronics | Automotive, appliances, general goods |
Thin wall molding pays off in high-volume, material-sensitive industries. However, it comes with a higher upfront tooling cost and a much steeper technical learning curve. Conventional molding is still the go-to for general parts where walls can stay thicker and the production scale doesn’t justify the added complexity.
Selecting the Right Thin Wall Molding Partner
Choosing the right supplier for thin wall injection molding isn’t just about comparing quotes—it’s about finding a partner who can actually meet the technical demands of your part. Thin wall molding has a far narrower process window than conventional molding, so you want to make sure your supplier has the right mix of equipment, engineering expertise, and project experience.
Supplier Capabilities You Should Expect
- High-speed injection machines: Look for presses capable of >300 mm/s injection speed and high clamp tonnage; otherwise, they may not be able to fill thin sections consistently.
- Moldflow analysis and DFM (Design for Manufacturability): A good partner will run simulations before cutting steel, helping to predict potential short shots, weld lines, or warpage before they become real problems.
- Proven track record: Thin wall molding isn’t a trial-and-error game. Ask for case studies or examples of similar parts they’ve run successfully.
How to Evaluate a Supplier
When you’re talking to potential partners, don’t just ask “Can you mold this part?” Instead, dig deeper:
- What’s the maximum injection speed and pressure your machines can sustain?
- Do you offer in-house toolmaking, or will tooling be outsourced?
- How do you validate cooling and venting strategies before mold fabrication?
- Can you share process capability data (Cp, Cpk) from previous thin wall projects?
Suppliers who hesitate on these questions may not have real thin wall experience.
Thin Wall Supplier Checklist
Here’s a practical checklist you can use when vetting molding partners:
| Requirement | Why It Matters | What to Look For in a Supplier |
| High-speed presses (300–600 mm/s) | Ensures thin walls fill before resin freezes | Electric or hybrid presses with documented specs |
| Moldflow / Simulation capability | Identifies risks (short shots, warpage) before tooling | Access to software like Autodesk Moldflow or Sigmasoft |
| Tooling expertise | Critical for venting, gating, cooling | In-house tool shop or strong tooling partners |
| Experience with similar parts | Proves real-world capability, not just theory | Case studies, reference parts, or customer testimonials |
| Quality systems | Keeps consistency across high-volume runs | ISO 9001, IATF 16949 (for automotive), FDA/ISO 13485 (for medical) |
| Communication & support | Faster iteration, smoother problem-solving | Dedicated engineering support team |
Thin wall injection molding amplifies every weakness in the supply chain. If your supplier doesn’t have the right machines, design tools, or experience, you’ll pay for it in trial-and-error and delayed launches. A strong partner, on the other hand, helps you get thin wall parts into production faster, with fewer surprises.
Final Thoughts
Thin wall injection molding creates lighter, faster, and more cost-efficient products without sacrificing performance. By reducing wall thickness, manufacturers save on material, cut cycle times, and increase overall productivity.
But here’s the catch: thin wall molding is far less forgiving than conventional molding. That’s why the smartest manufacturers start considering thin wall requirements early in the design stage. Choosing the right resin, planning for uniform wall sections, and working with a supplier that understands high-speed molding. All of these help prevent expensive redesigns and production delays later on.
If lightweighting, material efficiency, or high-volume output are priorities for your project, thin wall injection molding deserves a spot on your design table. Exploring reliable injection molding solutions can help you plan the right process from prototype to production.