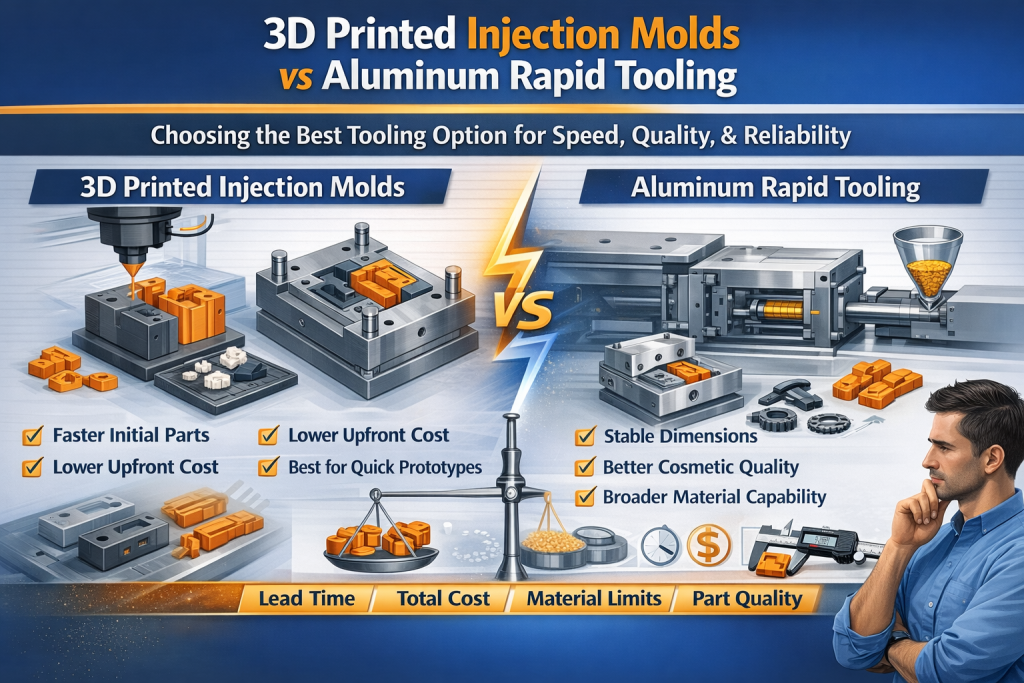
3D printed molds can get you early parts fast, but the data often breaks down when you push toward production conditions—pressure, temperature, cycle time, and repeatability. Aluminum rapid tooling costs more upfront, yet it’s the option that typically produces stable dimensions, cleaner shut-offs, and more reliable cosmetic results. In this guide, you’ll see where each method wins on lead time, total cost, material limits, tool life, and the failure modes that derail schedules.
What Is a 3D Printed Injection Mold?
A 3D printed injection mold is usually a set of printed core and cavity inserts, most often made from a high temperature resin. You install those inserts into a standard mold base and run them on a real injection molding press. You can get molded parts quickly, and that is the point. The decision comes down to what you need the tool to prove: fast geometry validation, or production intent behavior.
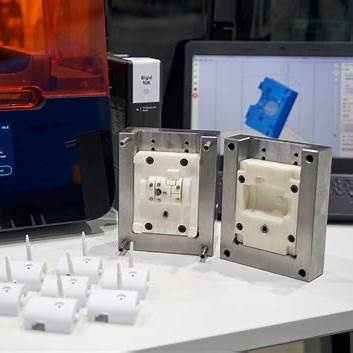
In a typical project, the process is straightforward.
- Print the inserts (core and cavity, sometimes with a simple gate and runner)
- Post-cure and finish the inserts to improve stability and surface integrity
- Fit the inserts into a mold base for alignment, clamping, and ejection
- Run short molding trials while controlling heat buildup and flash risk
This approach works best when you need early answers. You can check fit and assembly, confirm key features, and get a small set of samples for review. The limitation shows up when you push toward production-like conditions. Because the insert material is resin-based, the process window is often narrower, and you may see shut-off wear, venting challenges, or part-to-part drift as the insert heats up. If you need repeatable dimensions, controlled cosmetics, and data you can trust for the next build, that is where aluminum rapid tooling usually becomes the stronger option.
What Is Aluminum Rapid Tooling?
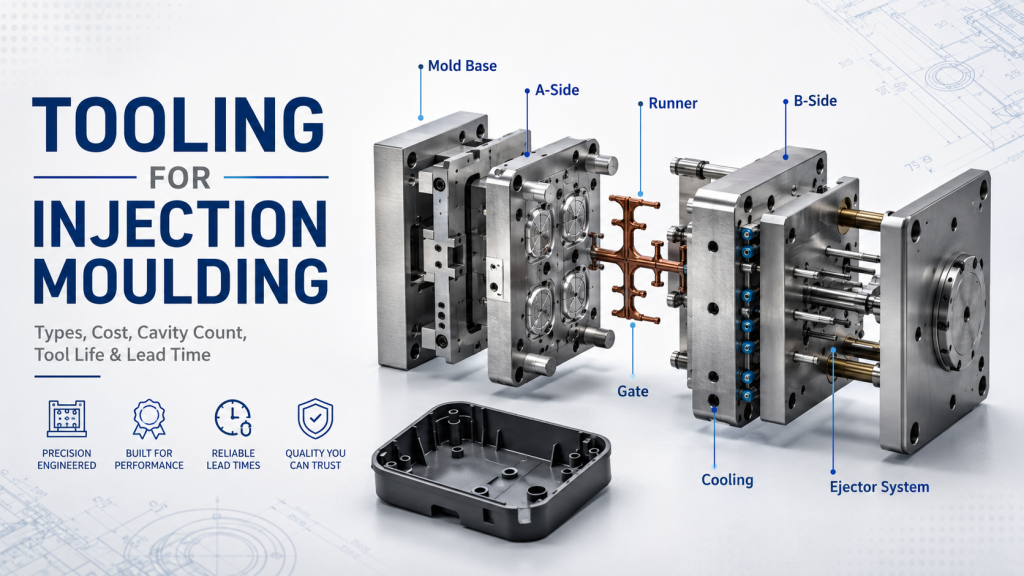
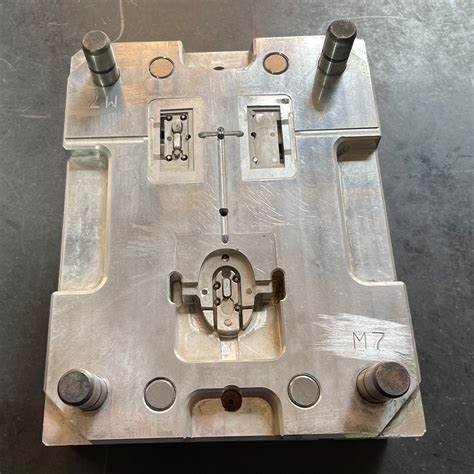
Aluminum rapid tooling is a CNC-machined aluminum mold built to run on a standard injection molding press, typically using production-grade molding practices but with a faster tool build cycle than steel. Think of it as the practical middle ground between “prototype-only” tooling and full production steel. If you care about repeatability, cosmetics, and production-intent behavior, this is often the first tooling step that gives you data you can actually trust.
How it’s made
In most projects, the workflow follows a familiar mold-making sequence, just optimized for speed.
- The core and cavity are CNC machined from aluminum, commonly 6061 or 7075
- The tool is assembled with standard mold components (ejection, sprue bushing, alignment, guides)
- A first trial is run to verify filling, shut-offs, venting, ejection, and part quality
- The tool is adjusted based on trial results, then used for pilot runs or low-volume production
Because aluminum machines quickly, you can iterate faster when you need to change gates, add vents, tune shut-offs, or adjust steel-safe dimensions. You still have to follow solid tool design rules, but you are not waiting on long steel lead times just to learn the first set of production lessons.
Typical positioning: what’s best for
Aluminum rapid tooling is best positioned as bridge tooling. It sits between early validation and full-scale production.
- Production-intent learning: shrink, warpage, cosmetics, and repeatability under realistic molding conditions
- Pilot runs and low-volume builds where you need stable output, not just a few samples
- Programs where schedule risk is high, and you want a tool that supports controlled iteration
If your goal is simply to get “some molded parts” quickly, a printed mold may be enough. If your goal is to validate the design the way it will behave in real molding, aluminum rapid tooling is usually the point where the results stop being fragile and start being dependable.
Side-by-Side Comparison (Decision Snapshot)
Before you go deep on details, align on what you’re really buying: speed to first parts or confidence in production-intent results. This snapshot is meant to help you decide quickly, then read the sections that matter most for your situation.
| Decision Factor | 3D Printed Injection Molds | Aluminum Rapid Tooling |
| Lead time | Often fastest to get initial tooling ready; good for rapid sampling | Slightly longer build, but typically reaches stable “decision-grade” parts faster |
| Upfront cost | Lower entry cost for simple inserts and small runs | Higher upfront cost due to machining and assembly, but more predictable output |
| Mold life | Short tool life; part count is limited and highly dependent on resin/process | Longer tool life; better suited for pilot runs and low-volume production |
| Material compatibility | Best with more forgiving resins and lower-stress processing; limited for aggressive materials | Broader material capability, including many production-grade engineering resins |
| Part quality (cosmetics) | Surface and shut-off quality can vary; higher sensitivity to heat and wear | Better surface control and shut-off integrity; more consistent cosmetics |
| Tolerance & repeatability | Repeatability can drift as the insert heats or degrades; tighter window to hold CTQs | More stable dimensions and part-to-part consistency across runs |
| Cooling & cycle time | Cooling is often less efficient; cycle time may be constrained to protect the insert | Better heat transfer and cooling options; more realistic cycle times |
| Risk profile | Common risks: heat-related deformation, shut-off wear, flash, insert damage | Common risks: longer initial build and tuning, but fewer “tool material” failures |
| Best use cases | Fit/assembly checks, quick geometry validation, very low quantity sampling | Production-intent validation, pilot runs, bridge tooling, low-volume builds |
If your main question is “Does this design assemble and function at a basic level?”, printed tooling can be a rational first step. If your main question is “Can we run this part predictably, with stable dimensions and controlled appearance?”, aluminum rapid tooling is usually the cleaner answer.
Next, we’ll break down the two areas that cause the most costly surprises: lead time in reality (not just quoted dates), and total cost per usable part (not just tooling price).
Lead Time: Which One Is Faster in Reality?
If you only measure lead time by “when do I get the first molded part,” 3D printed molds often win. But if you measure lead time by “when do I get parts I can make decisions with,” aluminum rapid tooling frequently catches up and, in many programs, becomes the faster path overall.
3D printed molds: fast to start, limited to friendly conditions
A printed mold can move quickly because you’re not waiting on extensive CNC machining and tool assembly. You can get inserts printed, finished, and installed in a base in a short time, which is valuable when you need early samples.
The practical constraint is that you often have to keep the molding process “friendly” to the insert.
- You may need lower injection pressures and more conservative fill settings to protect shut-offs and edges
- Heat management becomes a limiting factor, so cycle time and melt temperature choices narrow quickly
- As the insert warms up, you can see flash, surface wear, or part-to-part drift that forces constant retuning
This is where lead time quietly expands. You are not waiting for a tool shop, but you may spend extra time chasing a stable process window, especially if you are trying to mold closer to production conditions.
Aluminum rapid tooling: slower upfront, faster to reach stable parts
Aluminum tooling typically takes longer to build at the start because it is machined, assembled, and validated like a conventional mold. However, once it hits the press, it usually behaves more like production tooling.
That changes the “time to usable results.”
- Shut-offs and vents tend to hold up better, so you spend less time fighting flash and leakage
- Heat transfers more predictably, so the process window is wider, and tuning is more repeatable
- When adjustments are needed, changes like adding venting, refining gates, or correcting steel-safe dimensions are more straightforward and durable
In other words, aluminum rapid tooling may cost you more time at the beginning, but it often saves time in the phase that hurts most: repeated trials, inconsistent parts, and decisions delayed because the data isn’t stable.
If your schedule is driven by a launch gate, a customer approval, or a pilot run, the question to ask is simple: do you need “first parts,” or do you need “repeatable parts”? That answer usually tells you which option is truly faster.
Cost: Upfront Tooling vs Cost Per Valid Part

Tooling quotes are easy to compare. What is harder, and more important, is the cost per valid part you can actually use to make a decision. In rapid programs, the “cheapest tool” can become the most expensive path if it creates extra trials, scrap, and schedule slip.
A simple way to frame it is this.
Total Cost = Tooling + Trials + Scrap + Engineering Hours + Delay Cost
If you keep that equation in mind, the pricing difference between printed molds and aluminum rapid tooling becomes much clearer.
When 3D printed molds look cheaper
Printed molds often win on entry cost because the inserts are faster to produce and require less machining and assembly. If your goal is a small set of samples under forgiving conditions, that lower upfront price can be the right trade.
The cost starts to climb when you need parts that behave like production.
- You spend more press time tuning around a narrow process window
- You may lose parts to flash, short shots, surface breakdown, or dimensional drift as the insert heats up
- Your team spends engineering hours separating “design issues” from “tool material limitations.”
- You risk repeating the work later with aluminum or steel because the results did not transfer
In other words, the tool can be inexpensive, but the program can get expensive if the output is inconsistent or not decision-grade.
When aluminum rapid tooling wins on total cost
Aluminum tooling costs more upfront, but it often reduces the costs that don’t show up on the quote. You are buying a tool that can run closer to production conditions with more stable behavior, which typically lowers iteration churn.
Aluminum tends to win on total cost when you need any of the following:
- Production-grade resin behavior rather than “prototype-friendly” processing
- More controlled cosmetics and shut-offs that stay stable across cycles
- Repeatable dimensions for CTQs, assembly interfaces, or sealing boundaries
- Higher part quantities for pilot builds, field testing, or early market runs
The financial impact is usually not subtle. Fewer re-trials, fewer scrapped parts, and fewer late-stage redesign decisions translate directly into shorter schedules and fewer engineering hours. If your timeline has real consequences, the delay cost often dominates everything else.
If you want a clean decision rule, use this: if you can tolerate a small number of parts and the learning goal is mainly geometry, printed molds can be cost-effective. If you need repeatable, production-intent data that you will base tooling or release decisions on, aluminum rapid tooling is usually the cheaper outcome—even when the initial quote is higher.
Part Quality and Transferability to Production
If you only need “a molded part,” almost any tooling route can get you there. The difference shows up when you ask a tougher question: can you trust what you’re seeing as a preview of production? That is what transferability means. You are not just judging the part in your hand. You are judging whether the tool can produce the same result again, under realistic settings, without constant babysitting.
Surface finish and cosmetics
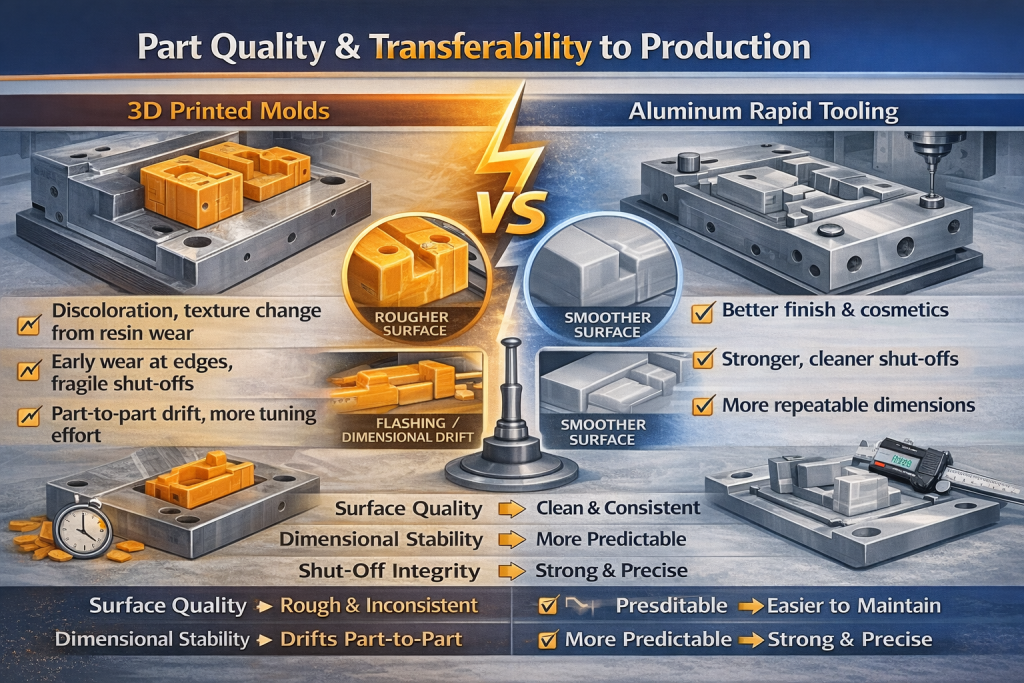
With 3D printed mold inserts, surface quality is often the first place you feel the gap. Even with post-processing, you may still see print texture telegraphing into the part, and cosmetic stability can change as the insert heats and wears.
Common cosmetic challenges you may run into include:
- Visible texture or gloss inconsistency from the insert surface
- Early wear at edges and shut-offs that shows up as flash or witness lines
- Higher sensitivity to release and ejection, which can leave marks on cosmetic faces
Aluminum rapid tooling is typically easier to finish, polish, and maintain. More importantly, it tends to hold that finish longer under molding conditions. If your part has customer-facing surfaces, defined gloss, or a tight cosmetic spec, aluminum tooling generally gives you a cleaner, more repeatable baseline.
Dimensional stability and repeatability
This is where many teams lose time. You measure the first few shots, the numbers look acceptable, and then the dimensions start to move. With printed inserts, heat and pressure can influence the tool more noticeably, so part-to-part variation can grow as the run continues.
What that looks like on a real project:
- Dimensions drifting after the tool reaches a steady temperature
- Variation on CTQ features tied to shut-offs, thin walls, or long flow paths
- More tuning effort to keep the process window narrow enough to hold tolerances
Aluminum rapid tooling is not automatically “perfect,” but it is typically more predictable. You get steadier thermal behavior, stronger edges and features, and a wider practical process window. That is why aluminum tooling is often the first step, where you can evaluate shrink and warpage trends with confidence, instead of treating every result as a one-off.
Gates, vents, and shut-offs
Transferability is also about whether the tool can support good molding fundamentals. Gate location, venting, and shut-off design determine whether you can fill the part cleanly, control burn marks, reduce flash, and eject reliably. This is where printed inserts can feel fragile.
With printed tooling, you may face:
- Venting features that are difficult to machine precisely after printing, or that degrade quickly
- Shut-offs that lose integrity faster, increasing flash risk, and making the process more sensitive
- Gate and runner changes that are possible, but not always durable enough for repeated iteration
With aluminum tooling, these features are easier to execute and maintain. You can add or refine vents, tune gates, and preserve shut-off performance across more cycles. If your part includes sealing boundaries, connector interfaces, fine shut-off lines, or overmolding-like edge requirements, aluminum rapid tooling usually delivers more reliable results and cleaner root-cause signals during trials.
The practical takeaway is simple. Printed molds can help you learn fast, but the output often reflects the limits of the insert material as much as it reflects your part design. Aluminum rapid tooling is the option you use when part quality and consistency are themselves the test, and you want what you learn to transfer into production decisions.
Material Compatibility: What You Can (and Can’t) Mold
Material choice is where this decision becomes very practical, very fast. You may be able to “get a part” from either tooling route, but the question you should care about is whether you can mold your target resin at settings that resemble production. If you have to detune the process just to protect the tool, the part you get may not represent what you’ll see later.
3D printed molds: better with forgiving resins and conservative processing
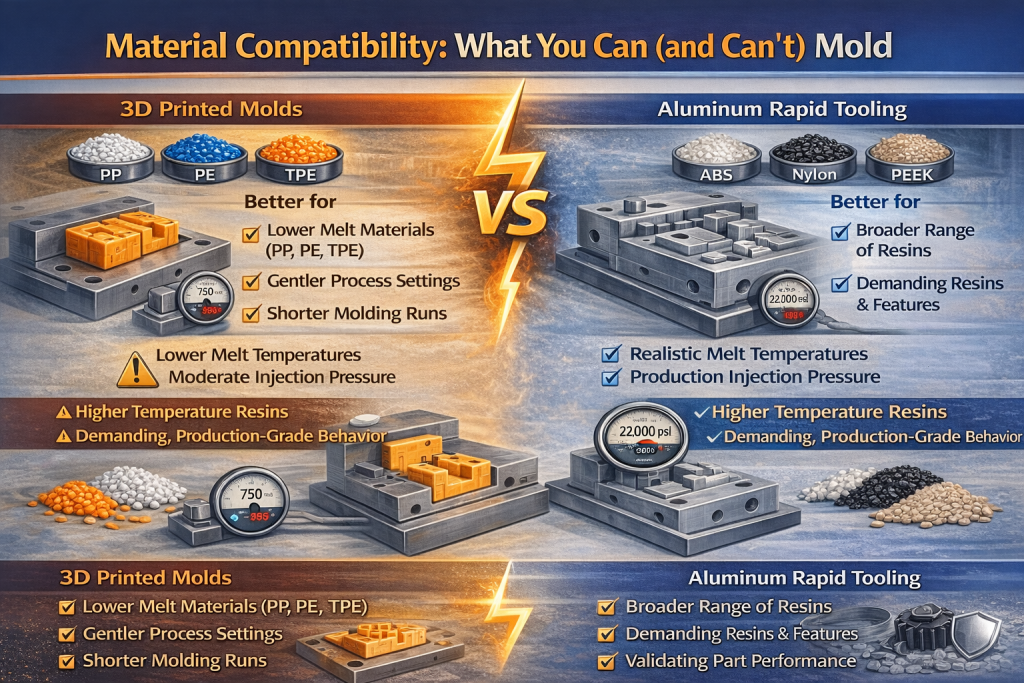
With polymer-based printed inserts, the limitation is not your part design alone. It is the insert’s ability to tolerate heat, pressure, and wear over repeated cycles. That pushes you toward materials and conditions that are easier on the tool.
Printed molds tend to work best when the resin and process are relatively gentle.
- Lower melt temperatures and moderate injection pressures
- Materials that flow easily and do not demand aggressive packing
- Short runs where you can accept a narrower process window
In practical terms, this is why many teams use printed molds for early geometry checks and sampling, then move on when they need to validate performance. If your program involves demanding features like tight shut-offs, thin walls, or long flow paths, material stress rises quickly, and printed inserts can become the limiting factor before your design has really been tested.
Aluminum rapid tooling: closer to production-grade resin behavior
Aluminum tooling changes the game because it behaves like “real” tooling in the areas that drive material compatibility. It can carry higher thermal loads, hold shut-offs more reliably, and run with more stable packing and cooling behavior. That gives you a process window that looks much more like what you would run in steel later.
This is where aluminum rapid tooling earns its place.
- You can mold a broader range of engineering resins at realistic temperatures and pressures
- You can evaluate shrink and warpage trends with more confidence
- You can run materials that require stronger packing control without the tool becoming the failure point
This matters most when you are validating strength, fatigue, chemical resistance, or sealing performance. Those outcomes depend heavily on molding conditions. If you have to compromise the process to protect a printed insert, you may end up validating the wrong thing.
A simple rule you can use is this: if the resin you care about is demanding, or the part requirements depend on stable processing, aluminum rapid tooling is usually the first step, where the material behavior you observe is truly production-relevant.
Mold Life and Volume: How Many Parts Do You Need?
This is the section most teams underestimate. You rarely choose tooling based on an abstract “tool life” number. You choose it based on how many parts you need to make decisions without changing the rules halfway through. Once the tool starts wearing, heating differently, or flashing at shut-offs, your part data becomes noisy, and your volume plan quietly breaks.
3D printed molds: best for very low volume, when your goal is early learning
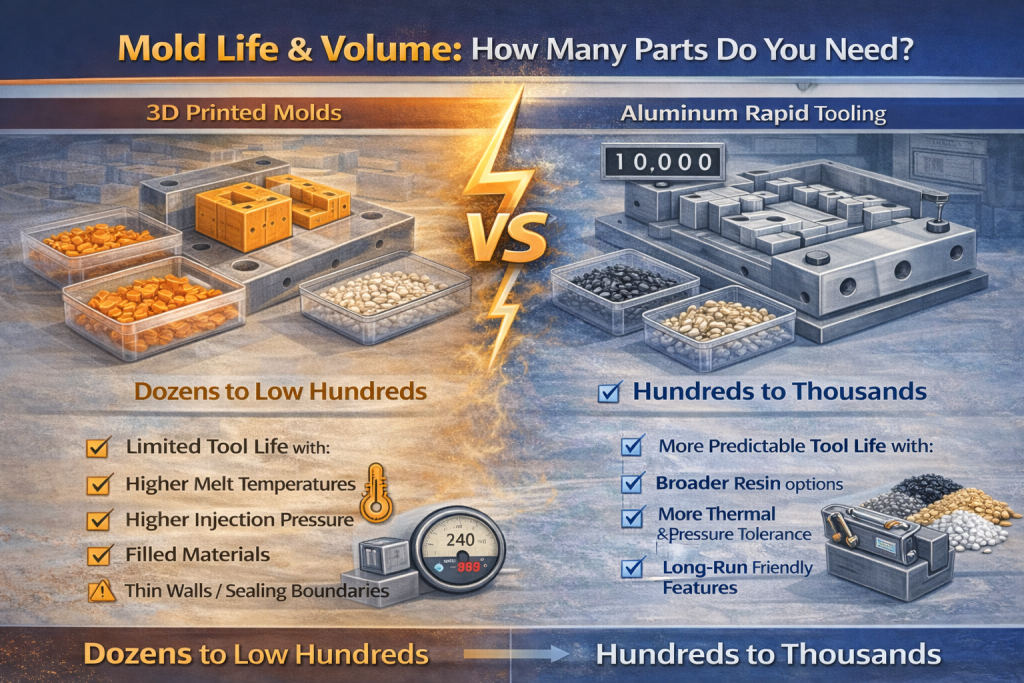
With polymer-based printed inserts, a common working range is dozens of parts, sometimes pushing into the low hundreds in favorable cases. The exact number varies a lot, and you should assume tool life will be limited if any of these conditions apply.
- Higher melt temperatures
- Higher injection pressure or aggressive packing
- Glass or mineral-filled materials
- Thin walls, sharp shut-offs, or tight sealing boundaries
- Longer run time that builds heat into the insert
The key point is not the number. It is what happens as you approach the limit. You may start with acceptable parts, then see flash creep in, dimensions drift, or the surface degrade. If you need consistent parts for measurement, assembly validation, or customer sampling, you should plan your printed mold volume conservatively.
Aluminum rapid tooling: designed for pilot runs and low-volume production
Aluminum rapid tooling is typically selected when you need hundreds to thousands of parts with stable behavior. Depending on part geometry, resin choice, and tool design, it can support pilot builds and bridge production without the tool itself becoming the dominant variable.
Aluminum tooling tends to scale better because:
- Shut-offs hold up longer and flash risk is easier to control
- Cooling and heat transfer are more predictable, which stabilizes the process window
- Wear surfaces and critical features can be designed with inserts or local reinforcement when needed
That said, volume capability is still application-dependent. A simple, well-vented part in an unfilled resin will run very differently from a thin-wall part in a filled engineering material. If your program involves fillers, abrasive resins, tight shut-offs, or cosmetic requirements, you should treat the volume range as a planning guide, then validate it during DFM and the first trial.
Design Rules That Change the Outcome (DFM Tips)

DFM is where this choice becomes predictable. A 3D printed mold is a resin insert, so it rewards “easy molding” geometry. Give the part proper draft, keep shut-offs robust, and avoid fragile edges or complicated side actions. Do that, and you get fast samples without turning every shot into troubleshooting.
Aluminum rapid tooling is different. You pick it when you want production-intent behavior, so the smart move is to design for tuning after the first trial. Leave critical dimensions steel-safe, and isolate likely-change features (snaps, seal lines, cosmetic faces) so you can adjust them without reworking the whole cavity. If you treat aluminum like a tool you can iterate, it becomes the fastest way to reach stable, decision-grade parts.
Risk and Failure Modes (What Usually Goes Wrong)
3D printed molds
Most problems come from one cause: the insert is resin, so it changes under heat and load. You’ll see it as the run goes on, not necessarily on the first few shots. Parts start to drift dimensionally as the insert warms, shut-offs lose integrity, and flash shows up at the parting line or around thin sealing edges. Once flash appears, you often have to “tighten” the process to control it, which increases pressure and heat and accelerates wear. At that point, you’re no longer evaluating your part. You’re managing insert damage.
Aluminum rapid tooling
Aluminum tools usually do not fail from the tool material. The common issues are process and design tuning issues. Cooling balance is the first one. If heat removal is uneven, you’ll see warpage, sink, or cosmetic variation until the process is tuned or cooling is improved. Venting and gating are the next ones. If vents are insufficient or the gate strategy is not ideal, you’ll see burn marks, short shots, or cosmetic defects. The difference is that these issues are correctable in a controlled way, and the tool typically remains stable while you fix them.
Use-Case Guide: Which Should You Choose?
The cleanest way to choose is to start from your scenario. What you need to prove determines which tooling route gives you usable results.
1) Cosmetic parts or clear parts
Recommendation: Aluminum rapid tooling
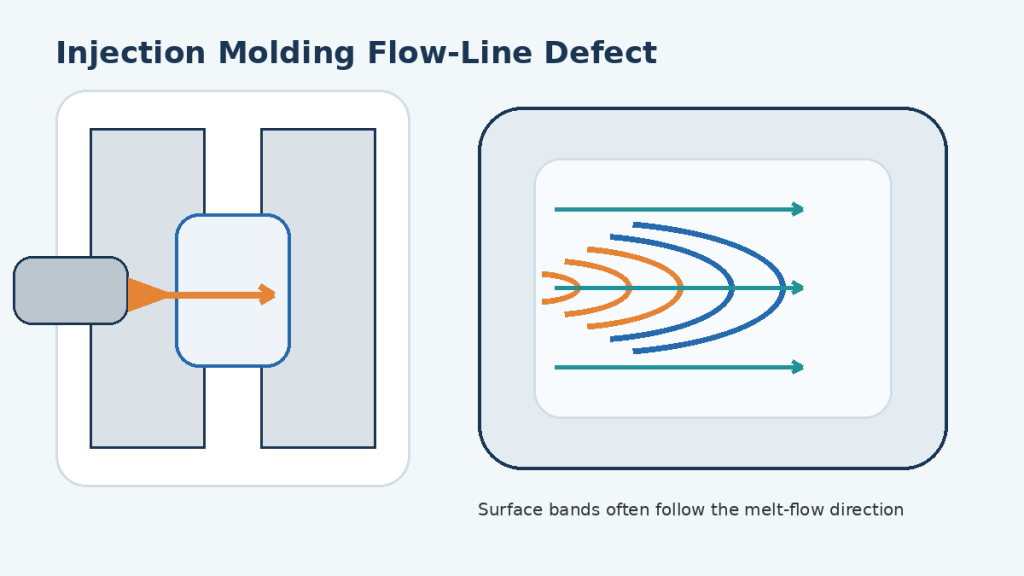
Reason: Cosmetics punish weak shut-offs and unstable surfaces. If you care about gloss, flow lines, parting line control, or clarity, you need a tool that holds finish and edges consistently. Aluminum tooling is simply more predictable for this type of evaluation.
2) You need true material performance data
Recommendation: Aluminum rapid tooling
Reason: If you are validating strength, fatigue, snap retention, chemical resistance, or thermal behavior, you need to mold your target resin under production-like conditions. A printed insert often forces conservative settings, which changes the part you are testing.
3) You only need early fit, assembly, and “does it work” checks
Recommendation: 3D printed mold
Reason: If your goal is geometry validation, basic function, and quick samples for internal review, printed molds can get you there fast. You are not buying long tool life here; you are buying speed to first learning.
4) Electronics sealing, encapsulation boundaries, or overmolding-style edges
Recommendation: Aluminum rapid tooling
Reason: Sealing lines and tight boundaries depend on stable shut-offs, venting, and consistent packing. Printed inserts can struggle as heat builds and edges wear. Aluminum tooling is the safer choice when flash or leak risk is unacceptable.
5) Fast A/B design comparisons
Recommendation: It depends on what you’re measuring
Reason: If you are comparing geometry and assembly quickly, printed molds can accelerate iteration. If you are comparing shrink, warpage, cosmetics, or repeatability, aluminum tooling gives you cleaner signals. The question is whether your A/B test is about shape or about molding behavior.
6) Low-volume sales build, field trials, or crowdfunding fulfillment
Recommendation: Aluminum rapid tooling
Reason: Once you need stable output across hundreds or thousands of parts, you want a tool that can run a wider process window without constant tuning. Aluminum rapid tooling is commonly used as bridge tooling for exactly this phase.
If you tell me your part category (cosmetic vs functional), target resin, and volume range, I can map you to the most likely best path in one decision line.
Final Thoughts
If you want to avoid rework, make your next step simple: send your part model and your target resin, and ask for a tooling recommendation tied to your volume and quality requirements. A good supplier will tell you what will be stable on press, what will be risky, and what can be tuned after T0, before you spend money. That one conversation usually saves more time than any shortcut.
Ready to move from discussion to parts? Explore Kemal’s rapid prototyping services.