Liquid silicone rubber (LSR) injection molding is a process where two liquid silicone components are mixed and cured in a heated mold. It keeps the material flexible while holding its shape and strength over time. LSR is used in products that must be highly reliable—such as medical seals, automotive protective parts, and buttons for consumer electronics. It works well in high heat, around chemicals, and under frequent use. As the global LSR market grows, more companies are looking at this process during product development. Knowing how it works, the main design rules, cost factors, and best-fit applications will help you make better decisions early in your project.
What Is Liquid Silicone Rubber (LSR)?
LSR is a two-part liquid silicone system that cures with a platinum catalyst. The two parts are mixed in equal ratios and injected into a heated mold, where they set into a permanent, flexible shape.
Compared to high-consistency rubber (HCR), which is solid and usually compression or transfer molded, LSR flows easily. This allows it to fill thin walls, small features, and complex shapes with less manual handling. LSR parts can be made in high volumes with stable quality and little variation.
Key material traits include:
- Temperature range: Often performs from about −50°C to +200°C.
- Chemical resistance: Stands up to oils, solvents, and weathering.
- Flexibility: Maintains elasticity over years of use.
- Biocompatibility: Many grades are safe for skin or contact with the body.
Grades are chosen based on the application:
- Industrial grade: General seals, gaskets, and electrical insulation.
- Food grade: Meets FDA 21 CFR 177.2600 or equivalent for food contact.
- Medical grade: Complies with ISO 10993 or USP Class VI for medical devices.
When selecting an LSR grade, you should confirm compliance with relevant standards such as ASTM D1418 for material identification, ISO 10993 for biocompatibility, or specific FDA food-contact regulations. This ensures the part can pass both performance tests and regulatory checks in your target market.
How LSR Injection Molding Works
The LSR molding process is designed for speed, precision, and consistent quality. It can be broken into four main steps:
- Metering and mixing – Two liquid components (Part A and Part B) are stored in separate drums. Each is pumped in equal volume to a static mixer. Pigments or additives can be added at this stage. The mixer blends them into a uniform compound.
- Injection into a heated mold – The mixed LSR is pushed into the mold under controlled pressure. The injection unit stays relatively cool to prevent premature curing, while the mold is heated to start the crosslinking reaction.
- Curing in the mold – Heat from the mold triggers rapid curing. Depending on part thickness and material grade, cure time can be as short as 15–60 seconds for thin sections, and longer for thicker parts.
- Demolding and post-processing – Once cured, the part is ejected. Some applications, especially in medical or food contact, require post-cure in an oven to remove volatiles and meet compliance requirements.
Specialized LSR equipment vs. thermoplastic injection machines
- LSR molds often use cold runner systems with valve gates to reduce waste and improve cycle times.
- Tight temperature control is critical: mold zones are heated precisely, while the injection system remains cool.
- Many LSR molds include vacuum systems to remove trapped air before injection, improving fill in micro features and reducing bubbles.
Typical production data
- Cycle time: Thin-walled parts (1–3 mm) often mold in under 60 seconds. Thick or complex parts may take 2–3 minutes.
- Dimensional tolerances: For small, rigid features, tolerances of ±0.05–0.10 mm are achievable. Larger, flexible parts typically hold ±0.25 mm or more, depending on geometry and material hardness.
By understanding these process steps and constraints, you can design parts that mold cleanly the first time, avoid unnecessary rework, and set realistic quality expectations.
Key Advantages of LSR Injection Molding
LSR injection molding offers a set of benefits that make it stand out from other molding processes—especially when your part must perform under demanding conditions.
- Precision molding for small features: LSR’s low viscosity allows it to flow into thin walls and fine details that are difficult for thermoplastics or HCR to fill. It’s possible to mold parts with micro-scale sealing lips or intricate geometries without heavy secondary finishing.
- Wide temperature resistance: Many grades remain stable from about −50°C to +200°C, and some can go even higher for short durations. This makes LSR ideal for components that face repeated sterilization, engine compartment heat, or extreme outdoor conditions.
- Chemical and aging resistance: LSR resists oils, fuels, solvents, ozone, and UV exposure far better than most organic elastomers. In long-term weathering tests, parts maintained over 90% of their original tensile strength after 1,000 hours of UV exposure.
- Biocompatibility: Medical-grade LSR can meet ISO 10993 or USP Class VI standards, making it safe for skin contact and many implantable applications. Food-grade versions comply with FDA 21 CFR 177.2600, enabling direct food contact.
- High automation potential: The combination of cold-runner molds, valve gating, and fast cure times means LSR production can run with minimal operator input. This reduces labor costs and improves process consistency.

In one fatigue test of an LSR automotive seal, the part underwent over 2 million compression cycles at 125°C without cracking or losing seal integrity. In another case, a medical valve retained less than 10% compression set after 22 hours at 175°C, confirming its long-term sealing capability in high-temperature environments.
These capabilities explain why LSR is often chosen when failure is not an option—and why design and material selection should be aligned early with the manufacturing process.
Limitations and Challenges of LSR Injection Molding
While LSR injection molding delivers excellent performance, it is not without challenges. Knowing these upfront can save you from costly redesigns or production delays.
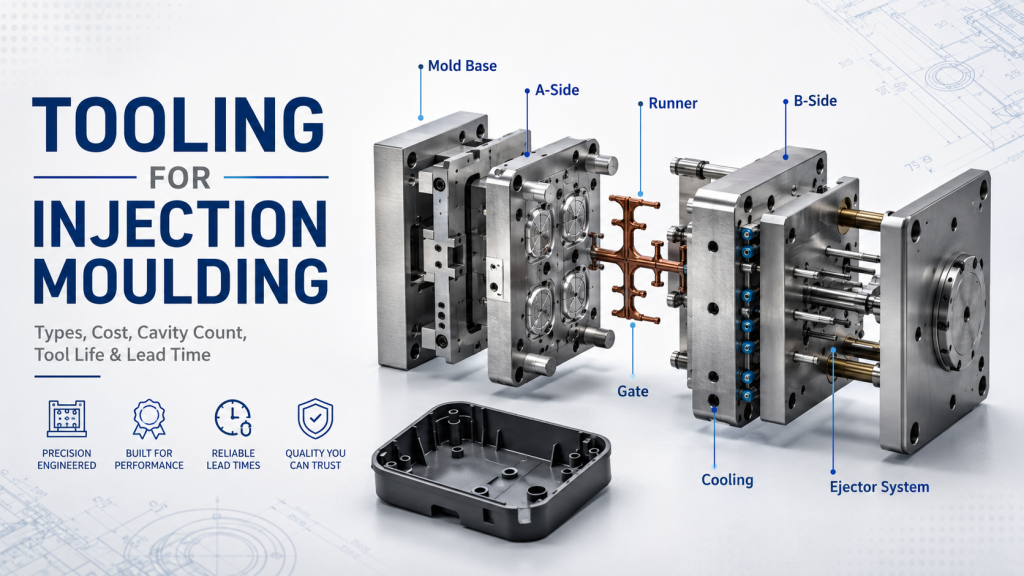
- Higher initial tooling cost: LSR molds require specialized designs, such as cold runner systems, valve gates, and vacuum venting. These features improve part quality and reduce scrap, but they also increase the upfront investment compared to basic thermoplastic molds.
- Soft material behavior in molding: LSR’s flexibility means parts can deform during demolding. Ejection systems must be designed to avoid stretching or tearing small features. Flow characteristics also differ from thermoplastics, requiring careful gate placement and venting to prevent defects.
- Tight process control requirements: LSR curing is sensitive to temperature, pressure, and mixing ratios. Even minor variations can cause incomplete curing, excessive flash, or dimensional inconsistencies.
Common Failure Modes and How to Prevent Them
1. Air entrapment (bubbles)
Air entrapment in LSR molding often comes from poor venting or the lack of vacuum assistance, especially in thin sections or complex part geometries. When air pockets remain inside the cavity, they create bubbles or voids that weaken the part and ruin its surface finish. To avoid this, mold designers typically add micro-vents at the parting lines—usually with a depth of 0.005–0.02 mm—and, for more intricate parts, integrate vacuum chambers. These measures let trapped air escape before the material fills the cavity, ensuring a clean, fully packed part.
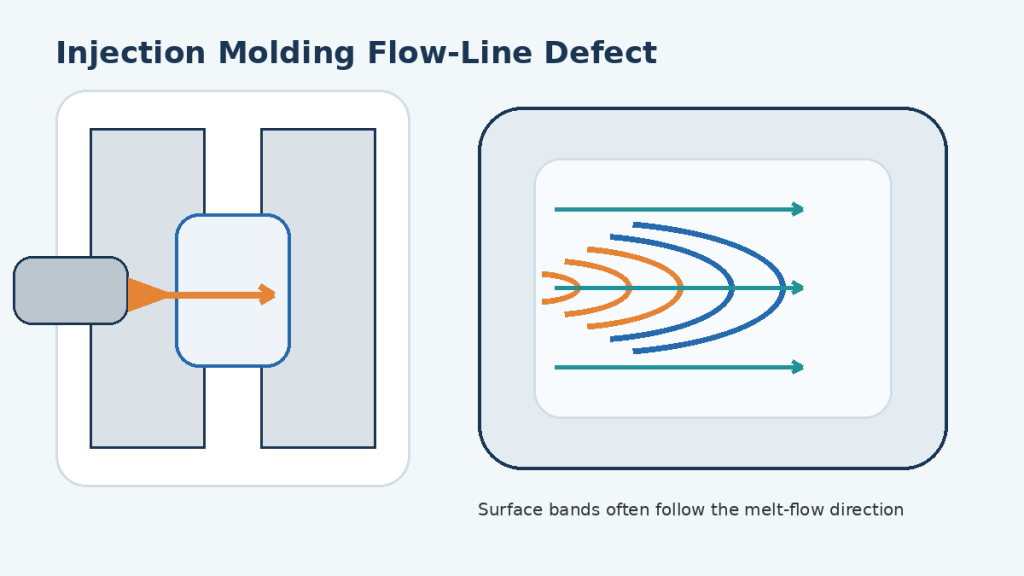
2. Flow marks or knit lines
Flow marks or knit lines usually appear when two flow fronts of molten LSR meet inside the mold but don’t fully bond together. This often happens if the gate location isn’t ideal or the mold temperature is too low, leaving visible lines and weak spots on the part surface. A practical way to prevent this is to place gates in thicker sections where the material stays hotter for longer, keep the mold temperature within the recommended range—typically between 150°C and 200°C—and use a balanced runner system so the material reaches all areas of the cavity at the same time. Together, these steps help the flow fronts merge smoothly, eliminating surface lines and restoring part strength.
3. Sticking to the mold (poor release)
In LSR injection molding, parts sometimes stick to the mold during ejection, causing surface scratches or even distortion in delicate features. This often happens when there isn’t enough draft angle on vertical walls, when the cavity surface is over-polished, or when the silicone bonds too strongly to the tool steel. The solution usually starts at the design stage: adding at least 0.5–1° of draft, avoiding excessive mirror-finish polishing, and applying the right mold coatings in high-friction areas can all help the part release smoothly. By reducing resistance during ejection, you protect both surface quality and dimensional accuracy.
By addressing these factors in the design and tooling stages, you can reduce scrap rates, shorten validation cycles, and ensure smoother production ramp-up.
Common Applications of LSR Injection Molding
LSR injection molding is widely used in industries where part performance must remain stable over years of service and in challenging environments.
1. Medical devices
Such as catheters, seals, valves, syringe stoppers, and puncture pads. LSR’s biocompatibility, sterilization resistance, and low extractables make it a trusted choice for medical devices.
Alternative materials: TPEs can be used for some non-critical components, but they often lack the same high-temperature sterilization resistance and long-term compression set performance.
2. Infant care products
Pacifiers, bottle nipples, teething rings. LSR offers a clean taste and odor profile, flexibility, and compliance with food-contact safety standards.
Alternative materials: Some food-grade elastomers are cheaper, but they may discolor or harden faster when repeatedly boiled or sterilized.
3. Automotive components
Such as seals, gaskets, protective boots, and button covers in automotive components. LSR handles extreme temperature cycles, vibration, and fluid exposure found in engine compartments and vehicle interiors.
Alternative materials: EPDM or NBR are common in seals, but LSR generally offers better temperature range, ozone resistance, and design freedom for complex geometries.
4. Lighting and electronics
Waterproof seals, keypads, light guides, protective membranes. Optical-grade LSR can mold clear parts for LEDs, while maintaining flexibility and environmental sealing.
Alternative materials: Polycarbonate and acrylic can achieve optical clarity, but they are rigid and need secondary gaskets for sealing—LSR can combine both clarity and sealing in one part.
Why LSR is Chosen Over Alternatives
Across these industries, LSR often replaces multi-part assemblies by integrating sealing, flexibility, and durability into a single molded part. This not only cuts assembly costs but also reduces potential leak paths or mechanical failures. The ability to mold fine features and thin walls without sacrificing long-term performance gives LSR a distinct edge when reliability is critical.
Design Guidelines for LSR Injection Molding
Designing for LSR injection molding requires a different mindset than designing for thermoplastics or solid silicone. The material’s flow characteristics, curing behavior, and flexibility all influence the choices you make on the drawing.
| Category | Recommendation | Common Issues & Fixes |
| Wall Thickness | – Typical: 1.0–3.0 mm
– Min: 0.5 mm (short flow path, good venting) – Avoid >5 mm without coring – Gradual transitions for variable walls |
Issue: Thick sections trap air, increase cure time.
Fix: Core out heavy areas; use 3:1 slope for transitions. |
| Gate Placement & Cold Runner | – Gate into thickest section
– Use cold runner valve gates to reduce waste – Keep gates off sealing lips & cosmetic surfaces – Balance runner lengths in multi-cavity molds |
Issue: Knit lines in sealing zones, uneven fill.
Fix: Adjust gate location; balance runners to all cavities. |
| Draft Angles & Surface Finish | – Draft: 0.5–1° (polished), 1–3° (textured)
– Avoid mirror polish on flexible parts – Keep texture depth consistent |
Issue: Over-polished surfaces cause suction during demolding.
Fix: Apply proper finish or texture to aid release. |
| Tolerance Control | – Small rigid features: ±0.05–0.10 mm
– Large flexible parts: ±0.25 mm or more – Use functional dimensioning instead of copying thermoplastic tolerances |
Issue: Overly tight tolerances increase scrap.
Fix: Set tolerances based on LSR process capability and part function. |
| Venting | – Micro-vents: 0.005–0.02 mm at parting lines
– Vacuum assist for complex or thin parts |
Issue: Air entrapment causes short shots or bubbles.
Fix: Add vents or vacuum channels in mold design. |
| Parting Line Design | – Keep parting lines away from sealing lips
– Allow flash to form outside functional areas |
Issue: Flash on seal surfaces leads to leaks.
Fix: Shift parting line or redesign lip profile. |
By following these guidelines, you improve the chances of getting good parts on the first try. This reduces mold rework and cuts the time from T0 sampling to production approval.
Cost Factors in LSR Injection Molding
Several elements influence the total cost of an LSR project. Understanding them early helps you set realistic budgets and choose cost-effective design options.
| Cost Factor | What It Means | Impact on Total Cost | Practical Tip |
| Mold Manufacturing | Steel grade, cavity count, cold runner, valve gates, vacuum system | High initial investment; more cavities reduce unit cost over volume | Design for automation to maximize return on mold investment |
| Material Grade | Industrial, food-grade, or medical-grade LSR | Medical-grade costs significantly more due to compliance testing | Match grade to actual application needs; avoid over-specifying |
| Production Volume & Cycle Time | Number of parts and cure speed | Shorter cycles and higher volumes lower unit cost | Use optimized wall thickness and gating to reduce cure time |
| Secondary Operations | Post-cure, trimming, coating, assembly | Adds labor and equipment time | Combine features in one molding step to minimize post-processing |
| Quality & Compliance | Dimensional checks, functional tests, certifications | Mandatory for regulated industries; increases cost and lead time | Plan inspection points into production flow to avoid bottlenecks |
Unit Cost Comparison
| Batch Size | Tooling Cost | Unit Cost (Estimated) | Notes |
| Small batch (5,000 pcs) | $35,000 | $3.20–$4.50 | Lower tooling utilization; unit cost higher due to long amortization |
| Medium batch (50,000 pcs) | $45,000 | $0.85–$1.20 | Better mold utilization; optimized cycle time reduces cost |
| Large batch (500,000 pcs) | $70,000 | $0.40–$0.65 | Highest efficiency; tooling cost spread over large volume |
Figures are for illustration only. Actual costs vary with part size, complexity, and grade of LSR.
Carefully balancing design complexity, volume, and material choice often makes a bigger difference in unit cost than focusing solely on tooling price.
Overmolding with LSR
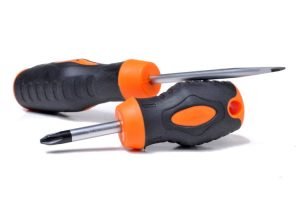
Overmolding with liquid silicone rubber is the process of molding LSR directly onto another substrate—often plastic or metal—to create a single integrated part. The LSR is injected over or around the substrate in a heated mold, where it bonds either chemically, mechanically, or both.
Advantages
| Benefit | Why It Matters |
| Sealing capability | Eliminates separate gaskets or O-rings, reducing leak paths. |
| Slip resistance | Adds a grippy surface to tools, controls, or handheld devices. |
| Comfortable feel | Softer touch for medical handles, consumer grips, and wearable devices. |
| Multi-function integration | Combines structural rigidity and soft features in one part, cutting assembly steps. |
Common Industry Applications
| Industry | Example |
| Medical | Surgical instrument handles with soft-touch grip and sealed surfaces for sterilization. |
| Electronics | Waterproof keypad covers or switch boots over rigid housings. |
| Automotive | Connector boots over plastic housings to prevent moisture ingress. |
Surface Preparation for Better Bonding
| Substrate Material | Typical Surface Prep | Purpose |
| PC, PBT, PPS, PA | Plasma or corona treatment | Increase surface energy for stronger chemical bonding. |
| Metal (stainless steel, aluminum) | Sandblasting or chemical etching | Create micro-roughness for mechanical interlock. |
| ABS, other low-energy plastics | Primer coating | Promote adhesion between LSR and non-polar surfaces. |
Tips for Reliable Bonds:
- Design mechanical interlocks (undercuts, through-holes) when chemical adhesion is limited.
- Keep bond lines away from high-flex or hinge areas to prevent peeling.
- Verify bond strength through peel or tensile tests before mass production.
By planning both material compatibility and surface preparation early, you can achieve durable overmolded parts that resist delamination even in harsh environments.
Choosing the Right LSR Injection Molding Manufacturer
Selecting the right manufacturing partner for LSR injection molding can determine whether your project launches on time and meets quality targets. A capable supplier not only provides reliable injection molding service but also supports you in design optimization, material selection, and compliance requirements.
Key Capabilities to Look For
| Capability | Why It Matters | What to Check |
| Specialized Equipment | LSR requires cold runner systems, vacuum venting, and precise temperature control. | Ask if they have dedicated LSR injection machines and tooling design expertise for cold-runner valve gates. |
| Industry Experience | Complex LSR parts need proven problem-solving from prior projects. | Request examples of similar parts they have molded, including material grades and application types. |
| Quality Certifications | Regulated industries demand formal quality systems. | Confirm certifications such as ISO 13485, ISO 9001, and FDA registration for applicable products. |
| Prototyping & Pilot Runs | Early sampling reduces risk before scaling up. | Check if they offer T0/T1 prototype tooling, small-batch runs, and process validation support. |
| Material Expertise | Matching LSR grade to application saves cost and ensures compliance. | Ask which suppliers and grades they commonly process, and whether they can support medical/food-grade projects. |
Technical Questions to Ask Before Selecting a Supplier
| Question | Why You Should Ask |
| How do you design venting and vacuum systems for thin or complex parts? | To gauge their mold design skill and defect prevention approach. |
| Can you provide process capability data (Cp, Cpk) for similar LSR parts? | To verify consistent production quality. |
| What is your maximum achievable tolerance for parts of this size and geometry? | To confirm they can meet your functional requirements. |
| How do you handle post-cure processes for medical or food-contact parts? | To ensure they can meet regulatory standards. |
| What bonding methods do you use for LSR overmolding onto plastic or metal? | To assess their ability to produce durable overmolded parts. |
A qualified LSR injection molding manufacturer will answer these questions confidently and provide supporting data or case studies. Evaluating suppliers with this checklist will help you avoid capability gaps, reduce the risk of costly redesigns, and build a long-term manufacturing relationship you can rely on.
Conclusion
Liquid silicone rubber injection molding delivers precision, durability, and reliable performance for demanding applications. Choosing the right material, applying sound design, and partnering with an experienced manufacturer can cut risk, control cost, and speed up launch.
We design and build LSR molds in-house, run production on dedicated equipment, and meet strict quality standards. Send us your CAD files and application details—we’ll review your design, recommend improvements, and provide a clear, competitive quote so you can move forward with confidence.
FAQs
What is the maximum temperature LSR parts can handle?
Most liquid silicone rubber (LSR) grades can handle continuous use temperatures from around −50°C to +200°C. Some specialty high-temperature grades can withstand short-term exposure above 230°C, but performance depends on the exact formulation and the environment. When selecting a grade, check the supplier’s data sheet and confirm it through testing under your actual service conditions, especially if the part will face repeated sterilization, thermal cycling, or combined heat and chemical exposure.
What’s the typical tolerance achievable in LSR molding?
For small, rigid features, LSR molding can typically achieve tolerances in the range of ±0.05–0.10 mm. Larger or more flexible parts usually require looser limits, often around ±0.20–0.25 mm, depending on geometry, wall thickness, and material hardness. Because LSR is an elastic material, tolerances should be set based on the functional requirements of the part rather than copied directly from thermoplastic designs. Reviewing tolerances with your molder during the design-for-manufacturing (DFM) stage helps avoid costly rework and unnecessary scrap.
Do LSR parts require post-curing?
Not all LSR parts require post-curing. For many industrial applications, parts can be used directly after molding. However, medical-grade and food-contact components often need a controlled post-cure—typically several hours in a hot-air oven—to remove residual volatiles and meet standards such as ISO 10993, USP Class VI, or FDA 21 CFR 177.2600. Post-curing can also improve compression set, thermal stability, and odor properties. The need for this step should be confirmed with both the material supplier and your molder based on the part’s end use and compliance requirements.