Manufacturers today face a clear design challenge: products need to be lighter, safer, and more comfortable to use—often all at once. Overmolding has become a key process to achieve this balance. By adding a second layer of material over an existing part, engineers can combine the strength of a rigid substrate with the grip, sealing, or aesthetic appeal of softer materials.
The demand for this capability is growing fast. According to Stratview Research, the medical overmolding market was valued at USD 1.95 billion in 2024 and is projected to grow at a CAGR of 4.3% between 2025 and 2030, driven by demand for ergonomic surgical tools and easy-to-clean surfaces. In the automotive sector, Verified Market Reports estimates the overmolding service market at USD 1.2 billion in 2024, expected to reach USD 2.5 billion by 2033 with a CAGR exceeding 9%. Overmolding is now a key process for steering wheels, handles, and electronic housings where comfort and durability matter as much as structural integrity.
This guide will walk you through everything from the basic process to design considerations, material selection, and cost analysis, so you can decide when and how to use overmolding in your own projects.
What Is Overmolding?
Overmolding is a two-stage injection molding process used to create a single part made from multiple materials. The first stage forms a rigid base component—called the substrate—using materials like ABS, PC, or even metal inserts. In the second stage, a softer or functional material, such as TPE or TPU, is molded directly over or around the substrate. The result is a single, fully bonded part without the need for adhesives or separate assembly steps.
What makes overmolding different from simply gluing or assembling two parts is the bonding mechanism created during molding. In many designs, the molten overmold material chemically bonds with the cooled substrate because both plastics share compatible polymer chains. Where chemistry alone can’t provide enough strength, engineers often add mechanical interlocks—features like undercuts, holes, or grooves in the substrate that let the overmold material flow through and harden, locking the two layers together.
This combination of chemical adhesion and mechanical locking gives overmolded parts the durability and precision needed for demanding applications, from automotive grips that withstand years of vibration to medical tools that must survive aggressive sterilization cycles.

How the Overmolding Process Works
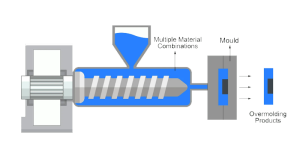
The overmolding process unfolds in two main stages, each with its own engineering considerations.
It begins with substrate molding. A rigid part—often made from ABS, PC, or metal—is molded first using conventional injection molding. At this stage, engineers may add mechanical interlock features like grooves or holes because they know the second material will flow into these areas later, creating a stronger bond. A typical molding cycle for the substrate might last 25–30 seconds, depending on part size and wall thickness.
Once the substrate cools, it moves to the overmolding stage. In some factories, this happens on the same machine using automated part transfer; in others, the substrate is moved to a second press configured for the overmold material. The mold closes, molten material—often a thermoplastic elastomer—is injected at carefully controlled temperatures between 200–260°C and pressures up to 800 bar. Here, flow characteristics matter: too much pressure can cause flash at the parting line; too little, and the overmold may not fully fill thin sections.
The cycle time for this second shot is typically longer—40–50 seconds—because softer materials often require slower cooling to prevent warpage or voids. After cooling, the finished part ejects from the mold as a single, fully bonded component.
Finally, post-processing may include trimming gates or runners, surface inspection, and, in regulated industries like medical devices, dimensional validation and sterilization.
Across both stages, parameters like melt temperature, injection pressure, and cooling time are tightly monitored because they directly affect adhesion strength and cosmetic quality. Advanced production lines now integrate real-time sensors to adjust these variables automatically, improving consistency across high-volume runs.
Overmolding vs. Insert Molding: How to Choose

At first glance, overmolding and insert molding look similar—both combine two materials into a single part. But the way they achieve it and the type of problems they solve can be very different.
Insert molding places a pre-formed component, often metal or hard plastic, into the mold before injecting a second material around it. It excels in structural strength and high-volume production. Think of threaded metal inserts inside plastic housings—here, mechanical performance and cost-per-part dominate the decision.
Overmolding, on the other hand, usually starts with a molded plastic substrate, then adds a softer or functional layer in a second molding step. It’s the go-to when you need soft-touch grips, vibration damping, waterproof seals, or contrasting colors for aesthetic purposes.
In real projects, the choice often comes down to annual production volume and part functionality. For example, an automotive supplier producing 5,000 gear knobs per year might choose overmolding to integrate a soft-touch grip over a rigid core because design flexibility and comfort matter more than cycle time. But if production scales to 100,000 units annually, insert molding becomes attractive because it cuts cycle time by combining steps and reducing secondary handling, lowering cost per part by up to 30–40%.
A practical rule of thumb:
- High durability + high volume → Insert molding
- Soft-touch, sealing, or aesthetics with moderate volume → Overmolding
This decision isn’t just about cost; it’s about aligning the process with the product’s functional priorities and production scale.
Materials Selection for Overmolding
Choosing the right material pairing is one of the most critical steps in overmolding, as adhesion strength, part durability, and even cosmetic quality all depend on material compatibility.
In most designs, the substrate is a rigid plastic like ABS, PC, or Nylon. The overmold layer is a softer thermoplastic elastomer (TPE, TPU) or sometimes a second rigid plastic for color contrast. For example:
- PC + TPE: Common for consumer electronics where a polycarbonate shell needs a soft grip.
- ABS + TPU: Popular in automotive interiors where vibration damping and scratch resistance matter.
- Nylon + TPE: Used in power tools for chemical resistance and impact strength.
These combinations work because the melt temperatures and surface energies of the materials are close enough to form either chemical bonds or mechanical interlocks at the interface. In tests, PC + TPE combinations often achieve peel strengths above 6–8 N/mm, while poorly matched pairs might not reach even half that value.
On the other hand, some pairings fail to bond well. A classic example is polypropylene (PP) + most TPUs. PP has low surface energy and a high shrinkage rate; when cooled, it pulls away from the softer layer, leaving weak adhesion or even delamination. Similarly, metals combined with soft plastics rely entirely on mechanical undercuts because there’s no chemical compatibility to exploit.
To avoid surprises, engineers use compatibility charts from material suppliers, but these only tell part of the story. Factors like thermal expansion mismatch also matter; if the overmold shrinks much faster than the substrate during cooling, internal stresses can break the bond over time, even if initial adhesion looked strong.
The safest approach is always a two-step evaluation: first, screen materials for known chemical compatibility; then run small-lot trials to test adhesion strength under real production conditions—heat cycling, chemical exposure, or mechanical loading.

Design Guidelines and Common Mistakes
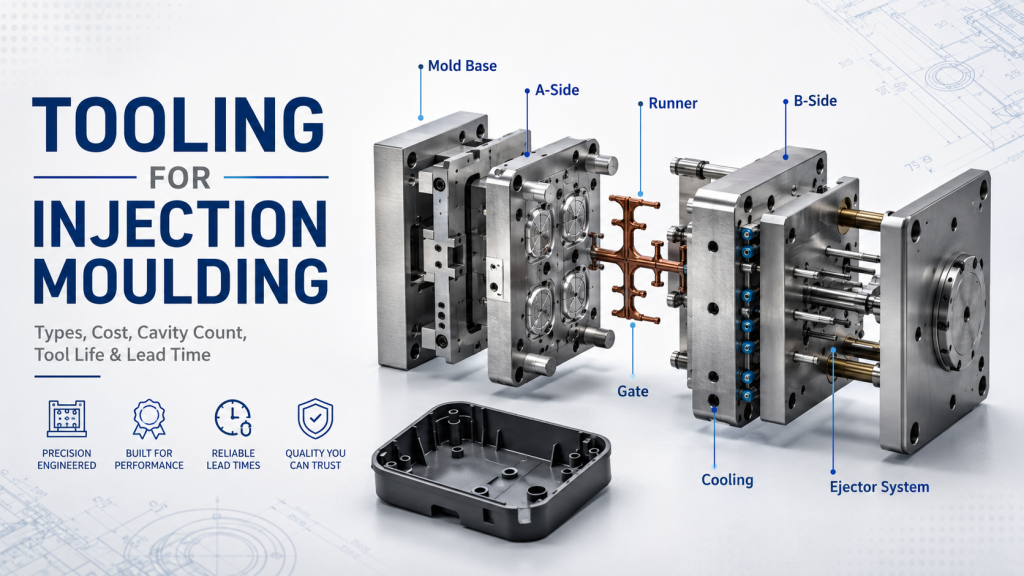
Designing for overmolding isn’t just about choosing the right materials. The mold geometry, part thickness, and venting strategy all directly influence whether the overmold bonds correctly—or fails during the first production run.
Take wall thickness as an example. If the overmold layer is too thin, the material may cool too quickly and fail to flow into undercuts, leaving gaps and poor adhesion at the edges. Too thick, and you risk sink marks or warpage as the part cools unevenly. A practical target is 2–3 mm for most TPEs on rigid substrates, but final values should come from material supplier data and prototype testing.
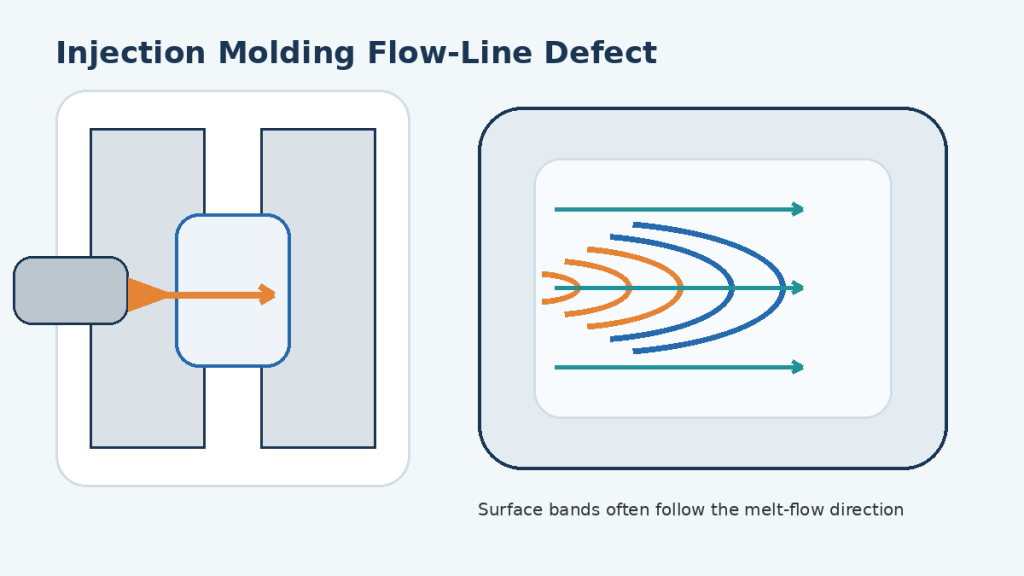
Gate placement is another frequent source of problems. Gates positioned too far from critical sealing areas may leave knit lines or incomplete fills right where the part needs the strongest bond. Moving the gate closer—or adding multiple gates—often eliminates these defects, though it may require additional venting to avoid trapped air.
One common failure we see in production is edge delamination. This usually happens when the substrate surface is too smooth or contaminated before overmolding. Adding micro-texture or using plasma cleaning before the second shot can increase bond strength by 20–30% in some cases.
Finally, venting deserves attention. Trapped air causes bubbles and weak spots in the overmold layer. Proper vent locations—often at the end of flow paths—and vent depths of 0.02–0.05 mm keep the air moving without causing flash.

Pre-Production Design Checklist
Before cutting steel for a mold or launching full production, engineers should confirm:
- Overmold thickness meets supplier-recommended minimums.
- Gate locations minimize knit lines near critical sealing or gripping areas.
- Substrate surface roughness is within the adhesion range (often Ra 2–4 µm for TPEs).
- Venting channels exist at all end-of-flow locations.
- Undercuts or holes for mechanical locking are correctly placed and dimensioned.
- Mold temperature control ensures even cooling across the entire part.
Running through this list during design reviews can prevent the most common overmolding failures, saving weeks of tool rework and thousands in production downtime.
Cost Considerations: From Prototyping to Production
Overmolding costs behave very differently depending on the volume and design stability of the part. At low volumes, the absence of expensive tooling gives overmolding a clear advantage. But as quantities rise, tooling costs spread across thousands of units, and the economics change quickly.
Consider a startup producing 200 prototype parts for a new handheld medical device. With on-demand overmolding, no hard tooling is needed; a soft prototype mold might cost $1,200, and each part could run $10–12 in material and machine time. Total cost: roughly $3,200.
The same part in full-scale production might require a hardened steel mold costing $25,000, but then each part might cost just $2–3 at 10,000 units per year. Even after adding tooling amortization, the unit cost drops by 30–40% compared with the low-volume setup.
But direct manufacturing cost is only part of the picture. A Total Cost of Ownership (TCO) analysis includes:
- Tooling amortization: How many parts must be produced before tooling cost per part becomes negligible?
- Inventory holding cost: High-volume production means storing thousands of parts, sometimes for months, adding 20–25% to total costs annually.
- Design change risk: A design update after tooling is cut can wipe out all cost savings; soft tooling or on-demand molds reduce this risk early on.
- Downtime cost: For parts affecting production uptime, faster turnaround can outweigh higher per-part prices if it prevents line stoppages.
In practice, many companies use a two-phase approach: start with low-cost prototype tooling to validate design and market demand, then shift to high-volume steel tooling once production volumes stabilize above the economic break-even point—often around 1,500–2,000 parts depending on geometry and material choice.
This phased strategy minimizes financial risk while still capturing the long-term cost savings of mass production.
Applications Across Industries
Overmolding isn’t tied to one specific market. Its value shows up wherever products need a mix of mechanical strength, ergonomic comfort, and environmental protection—but the priorities differ by industry.
In the automotive sector, steering wheels, gear knobs, and interior handles rely on overmolding to combine rigid structural cores with soft-touch surfaces. One Tier-1 supplier reported that switching from adhesive assembly to overmolding cut rework rates by 20% annually because the bond line defects common in glued assemblies disappeared. With millions of cars produced each year, that difference directly translates into millions of dollars saved.

In medical devices, overmolded grips and housings improve both usability and sterilization durability. A surgical instrument manufacturer ran a comparative ergonomic study: instruments with overmolded handles scored 15% higher in surgeon comfort ratings during simulated procedures, while also surviving 200+ autoclave cycles without surface cracking—something traditional two-piece assemblies often failed.

Consumer electronics use overmolding for waterproof seals and shock-absorbing corners in smartphones, smartwatches, and handheld devices. A leading wearable brand used TPE overmolding on watch casings to achieve an IP68 ingress protection rating without adding extra gaskets, cutting assembly labor by almost 30%.
Finally, industrial equipment benefits from overmolded connectors and tool handles where chemical resistance and impact strength matter more than aesthetics. One power tool maker found that replacing rubber sleeves with directly overmolded TPE reduced warranty claims from grip failures by 25%, largely because there were no longer seams or adhesives to degrade under heavy use.
Across all these industries, the recurring theme is clear: overmolding reduces assembly complexity, boosts product durability, and in many cases, directly improves user safety or comfort.

Future Trends in Overmolding
Overmolding technology is moving beyond basic two-material parts toward highly automated, digitally monitored production systems. The next three to five years will likely bring three major shifts that directly impact cost, quality, and design freedom.
The first is automation and lights-out manufacturing. Modern overmolding cells now integrate six-axis robots for part handling, in-mold labeling, and even inline assembly tasks. According to a case study by ENGEL, implementing smart process control systems led to a 10% reduction in cycle time and an 11% increase in output, while reducing per-part costs by over 4%. This demonstrates how automation not only addresses labor challenges but also boosts efficiency and cost competitiveness in high-volume overmolding operations.
Second, digital quality control is entering the mainstream. Instead of sampling parts offline, some injection presses now embed thermal cameras and pressure sensors directly into the mold. Real‑time data feeds machine learning models that flag incomplete fills or adhesion risks before the mold even opens. Pilot projects using edge computing and deep learning methods in injection molding have already achieved over 90% defect detection accuracy in production environments. Likewise, an AI‑based inspection system in casting products reached 99.86% accuracy, proving how computer vision can dramatically reduce reliance on expensive post‑process inspections.
Together, these advances point toward an overmolding process that is faster, smarter, and greener. The next generation of production lines won’t just mold parts; they will adapt parameters automatically, verify quality in real time, and run with minimal human intervention.

Common Pitfalls and How to Avoid Them
Even experienced design teams run into trouble when implementing overmolding for the first time. The problems rarely come from the molding machines themselves; they stem from design assumptions, material misunderstandings, or scaling mistakes. Here are three of the most common pitfalls—and how to prevent them.
The first is expecting universal material compatibility. Engineers sometimes assume any soft material will bond to any rigid substrate as long as the melt temperature is high enough. In reality, polymer chemistry dictates adhesion performance, and some pairings—like polypropylene with most TPUs—simply won’t bond without mechanical undercuts. The fix is simple: always consult compatibility charts early and run adhesion tests on small samples before committing to a full production tool.
The second pitfall is ignoring surface preparation. Contaminated or overly smooth substrates lead to weak bonding or edge delamination no matter how carefully you control temperature and pressure. A medical device supplier once saw a 15% scrap rate until they added plasma cleaning before overmolding, boosting bond strength by nearly 30%. Surface roughening, cleaning, or even chemical primers can turn a borderline process into a reliable one.
The third mistake is scaling too early. Teams sometimes jump straight from prototype tooling to mass production before validating cooling times, gate locations, and venting strategies. The result? Voids, warpage, and costly tool modifications. A phased approach works better: prototype tooling for design validation, pilot runs for process optimization, then hardened steel tooling for full production once the design and parameters stabilize.
Avoiding these pitfalls isn’t complicated—but it does require early testing, data-driven material selection, and staged production scaling rather than rushing straight to volume output.
Conclusion: Making Overmolding Work for Your Project
Overmolding gives product designers a rare combination of functional performance and design freedom. With one integrated process, you can add soft-touch grips, waterproof seals, or contrasting colors without secondary assembly steps or adhesives. Across industries—from medical tools that must survive sterilization cycles to automotive interiors demanding durability and comfort—overmolding consistently delivers lower defect rates, better ergonomics, and reduced production complexity.
If you’re considering overmolding for your next project, the best starting point is a design and cost feasibility check. This ensures your materials, tooling strategy, and production volumes align with both technical and financial goals.
Ready to see if overmolding is right for your part? Contact our team for expert design advice or a fast, customized quote.